






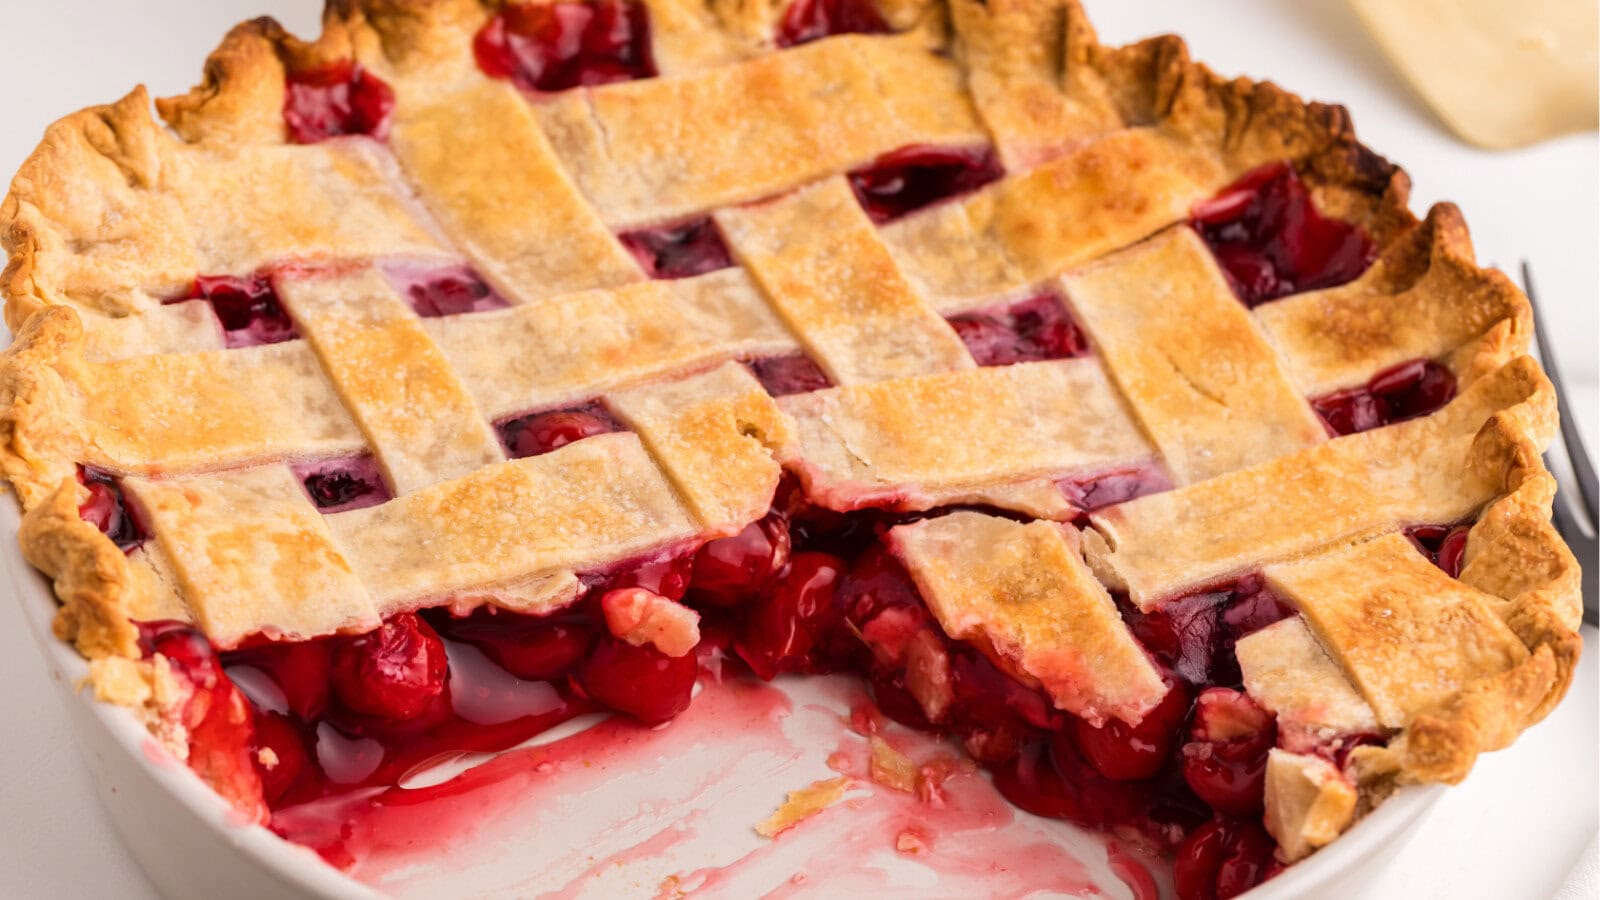
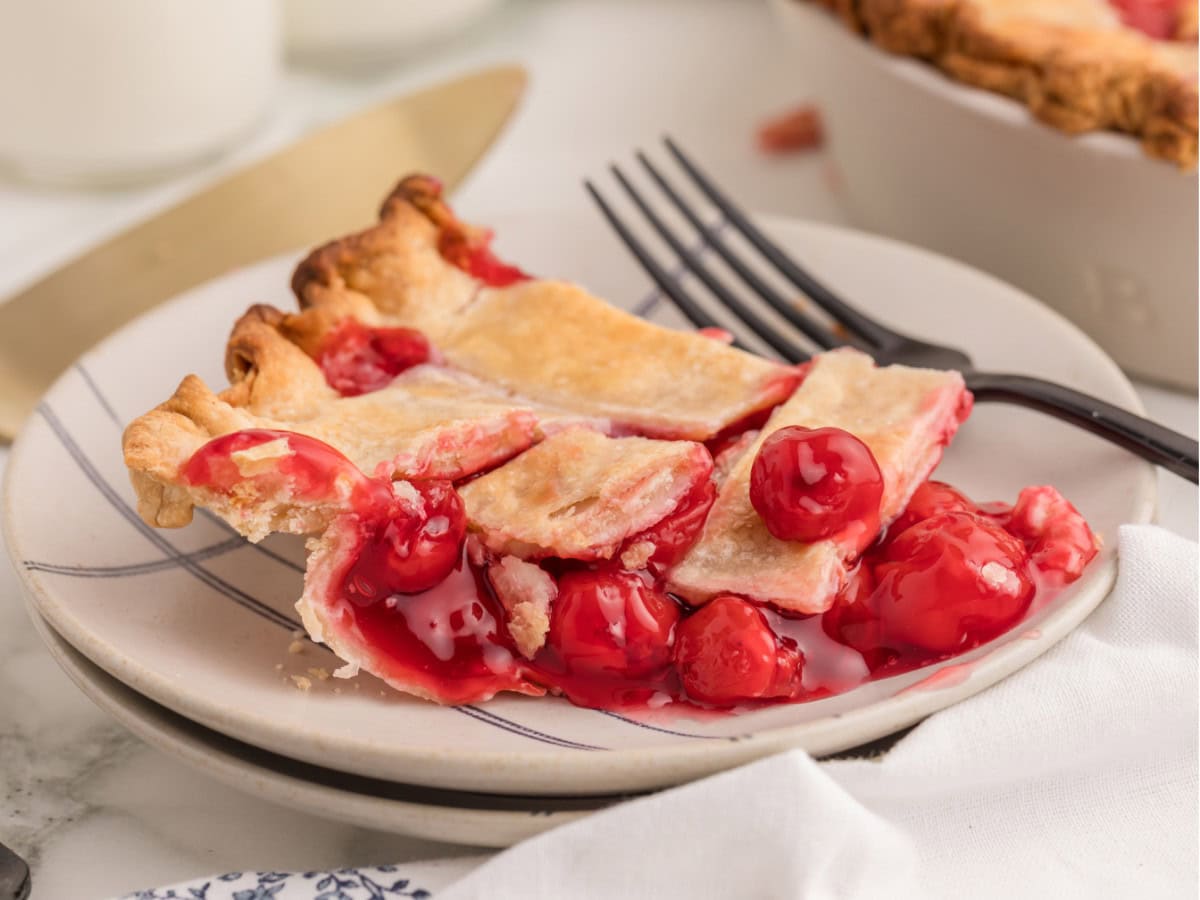
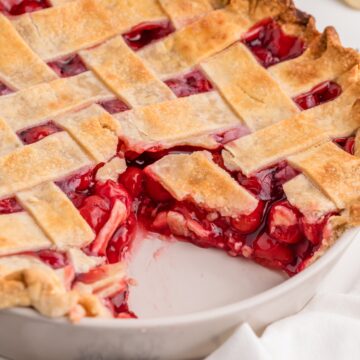
This easy cherry pie recipe takes just three minutes to assemble and 45 minutes to bake, making it one of the easiest homemade desserts you'll ever make! With a flaky, golden-brown crust and a sweet, juicy cherry filling, it tastes like you spent hours in the kitchen. You don't need any special baking skills or complicated ingredients, so it's a great recipe for beginners and busy families. Whether you're making dessert for Thanksgiving or Christmas, a summer cookout, or an ordinary weeknight, this simple cherry pie is always a crowd-pleaser. If you have always wanted to try a woven top, I have included detailed illustrated instructions that walk you through making a lattice pie crust one strip at a time. Serve it warm with a scoop of vanilla ice cream and watch it disappear. Serve it warm with a scoop of vanilla ice cream or enjoy a slice all on its own. There is no easier or more delicious way to make cherry pie, and you're going to love how little effort it takes!
Why this is the best Easy Cherry Pie recipe
It incredibly easy to make. This easy cherry pie uses refrigerated pie crusts and canned cherry pie filling, so there's no need to make pastry dough or prepare fresh cherries. You can have the whole pie assembled and ready for the oven in about 5 minutes.
You only need a few ingredients for this easy cherry pie. With prepared pie crusts, cherry pie filling, almond extract, milk, and sugar, you can make a delicious homemade dessert without a long grocery list. Everything is easy to find at your local grocery store, and you may already have most of it in your kitchen.
This cherry pie tastes like you spent hours making it. The sweet cherry filling and flaky, golden-brown crust make this pie taste like a traditional homemade dessert. A little almond extract brings out the cherry flavor and makes the filling taste even better.
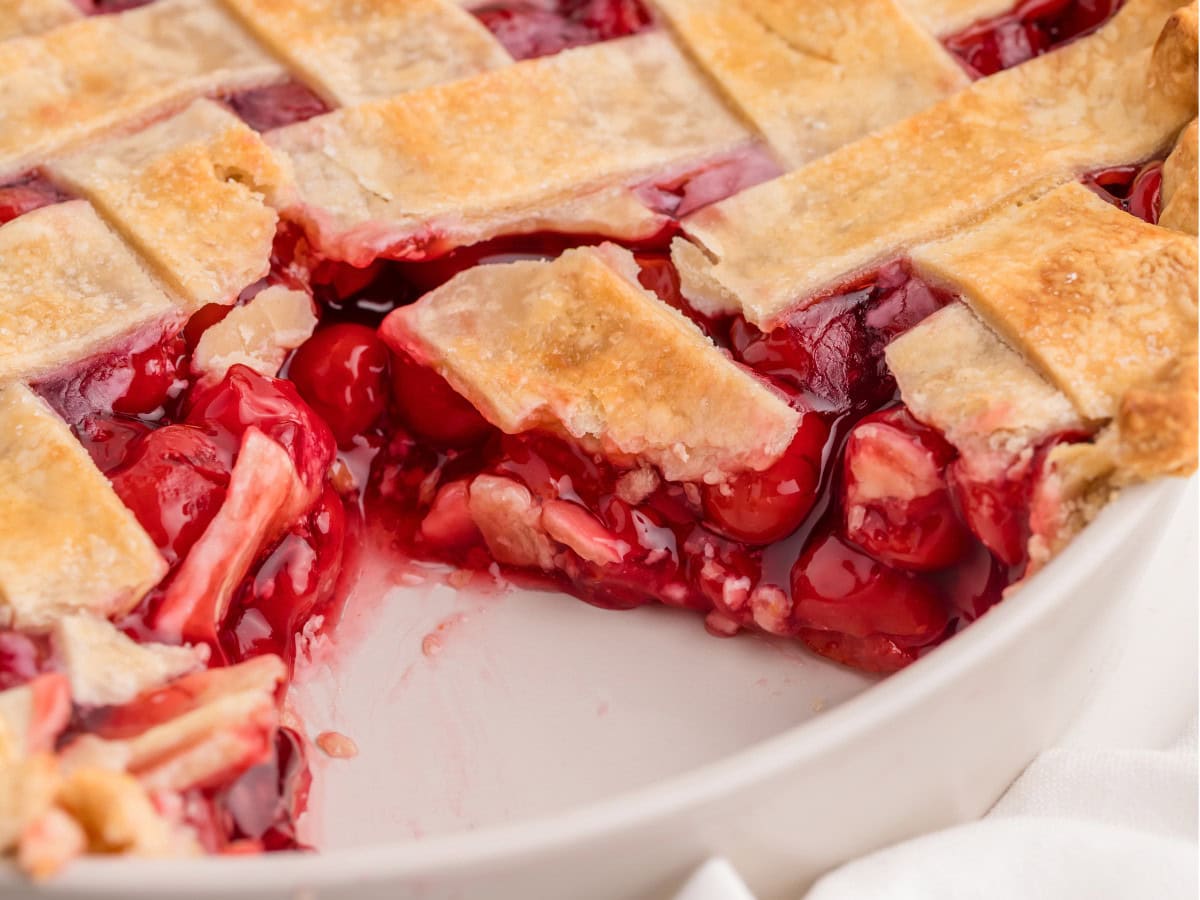
It's a great recipe for holidays and family gatherings. This easy cherry pie is a wonderful dessert for Thanksgiving, Christmas, summer cookouts, or Sunday dinner. You can make it ahead of time, even a day in advance, and it's delicious served warm or at room temperature with a scoop of vanilla ice cream.
This easy cherry pie is beginner-friendly. You don't need any special baking skills to make this cherry pie. Using prepared ingredients takes away the hardest parts of pie-making, so even someone who has never baked a pie before can make a beautiful dessert.
What makes this cherry pie so easy?
The secret to this cherry pie is that everything is pre-made, and I don't mean that you make it ahead of time. I mean that you buy it.
Is that cheating? Maybe it is, but who cares? The pie will be baked, and it will taste good.
So you take two refrigerated pie crusts and two cans of cherry pie filling, and you plop it all in a pie plate and bake it. Voilà, you've got an impressive cherry pie with all the flavor you love, and it took you 5 minutes to prep.
Read on for tips for making it taste like homemade and the instructions for that impressive woven top!
What you'll need to make an easy cherry pie
Equipment
The equipment for this pie is standard to any pie. You'll need a 9-inch pie dish (preferably a deep one), a rolling pin, and a pie shield.
A mini cookie cutter makes it easier to cut vent holes in the top crust of the pie, but if you don't have one, you can just cut diamonds or even plain slits in the top crust.
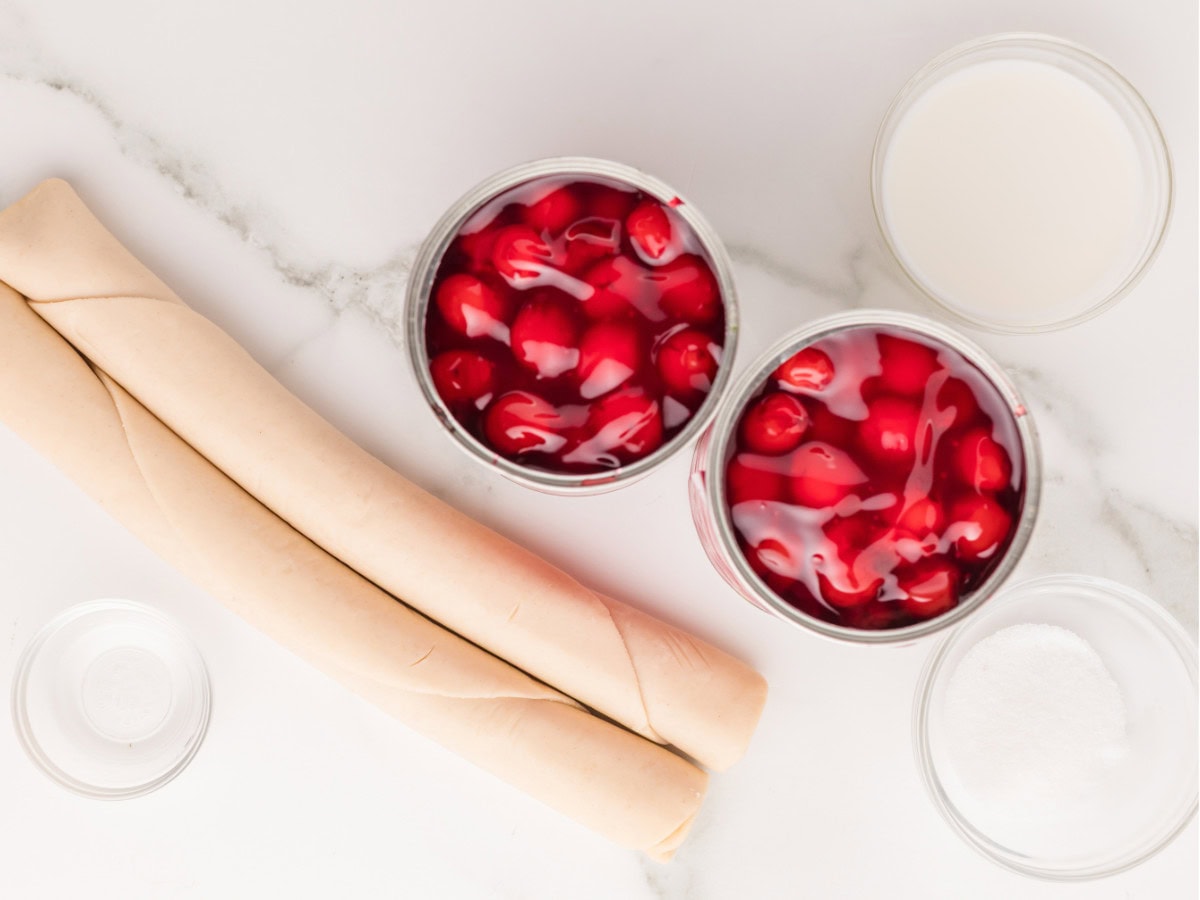
See the printable recipe card at the bottom of the page for all measurements and nutritional information.
Ingredients
- Prepared pie crusts - I always buy pie dough in the dairy case pre-made. I am normally a make-it-from-scratch kind of girl, but on Thanksgiving, there's so much to do already, without making homemade pastry dough. I have gotten the store brand and the Pillsbury, and both come out very nicely.
- Cherry pie filling - I have used both the regular and the lower sugar. These days I use all regular or some of each. Using all lower sugar with Splenda makes the pie come out tasting odd. Also, try to find cherry pie filling that has extra cherries and fewer juices/syrup. If you look, you can usually find some labeled "30% more cherries!" or something like that. Go for that stuff; it's better.
- Almond extract - You don't have to add this, but I think it makes an ordinary cheater cherry pie go over the top of the delicious scale.
- Milk
- Granulated white sugar
How to make this easy homemade cherry pie recipe
Instructions
- Preheat the oven to 425ºF.
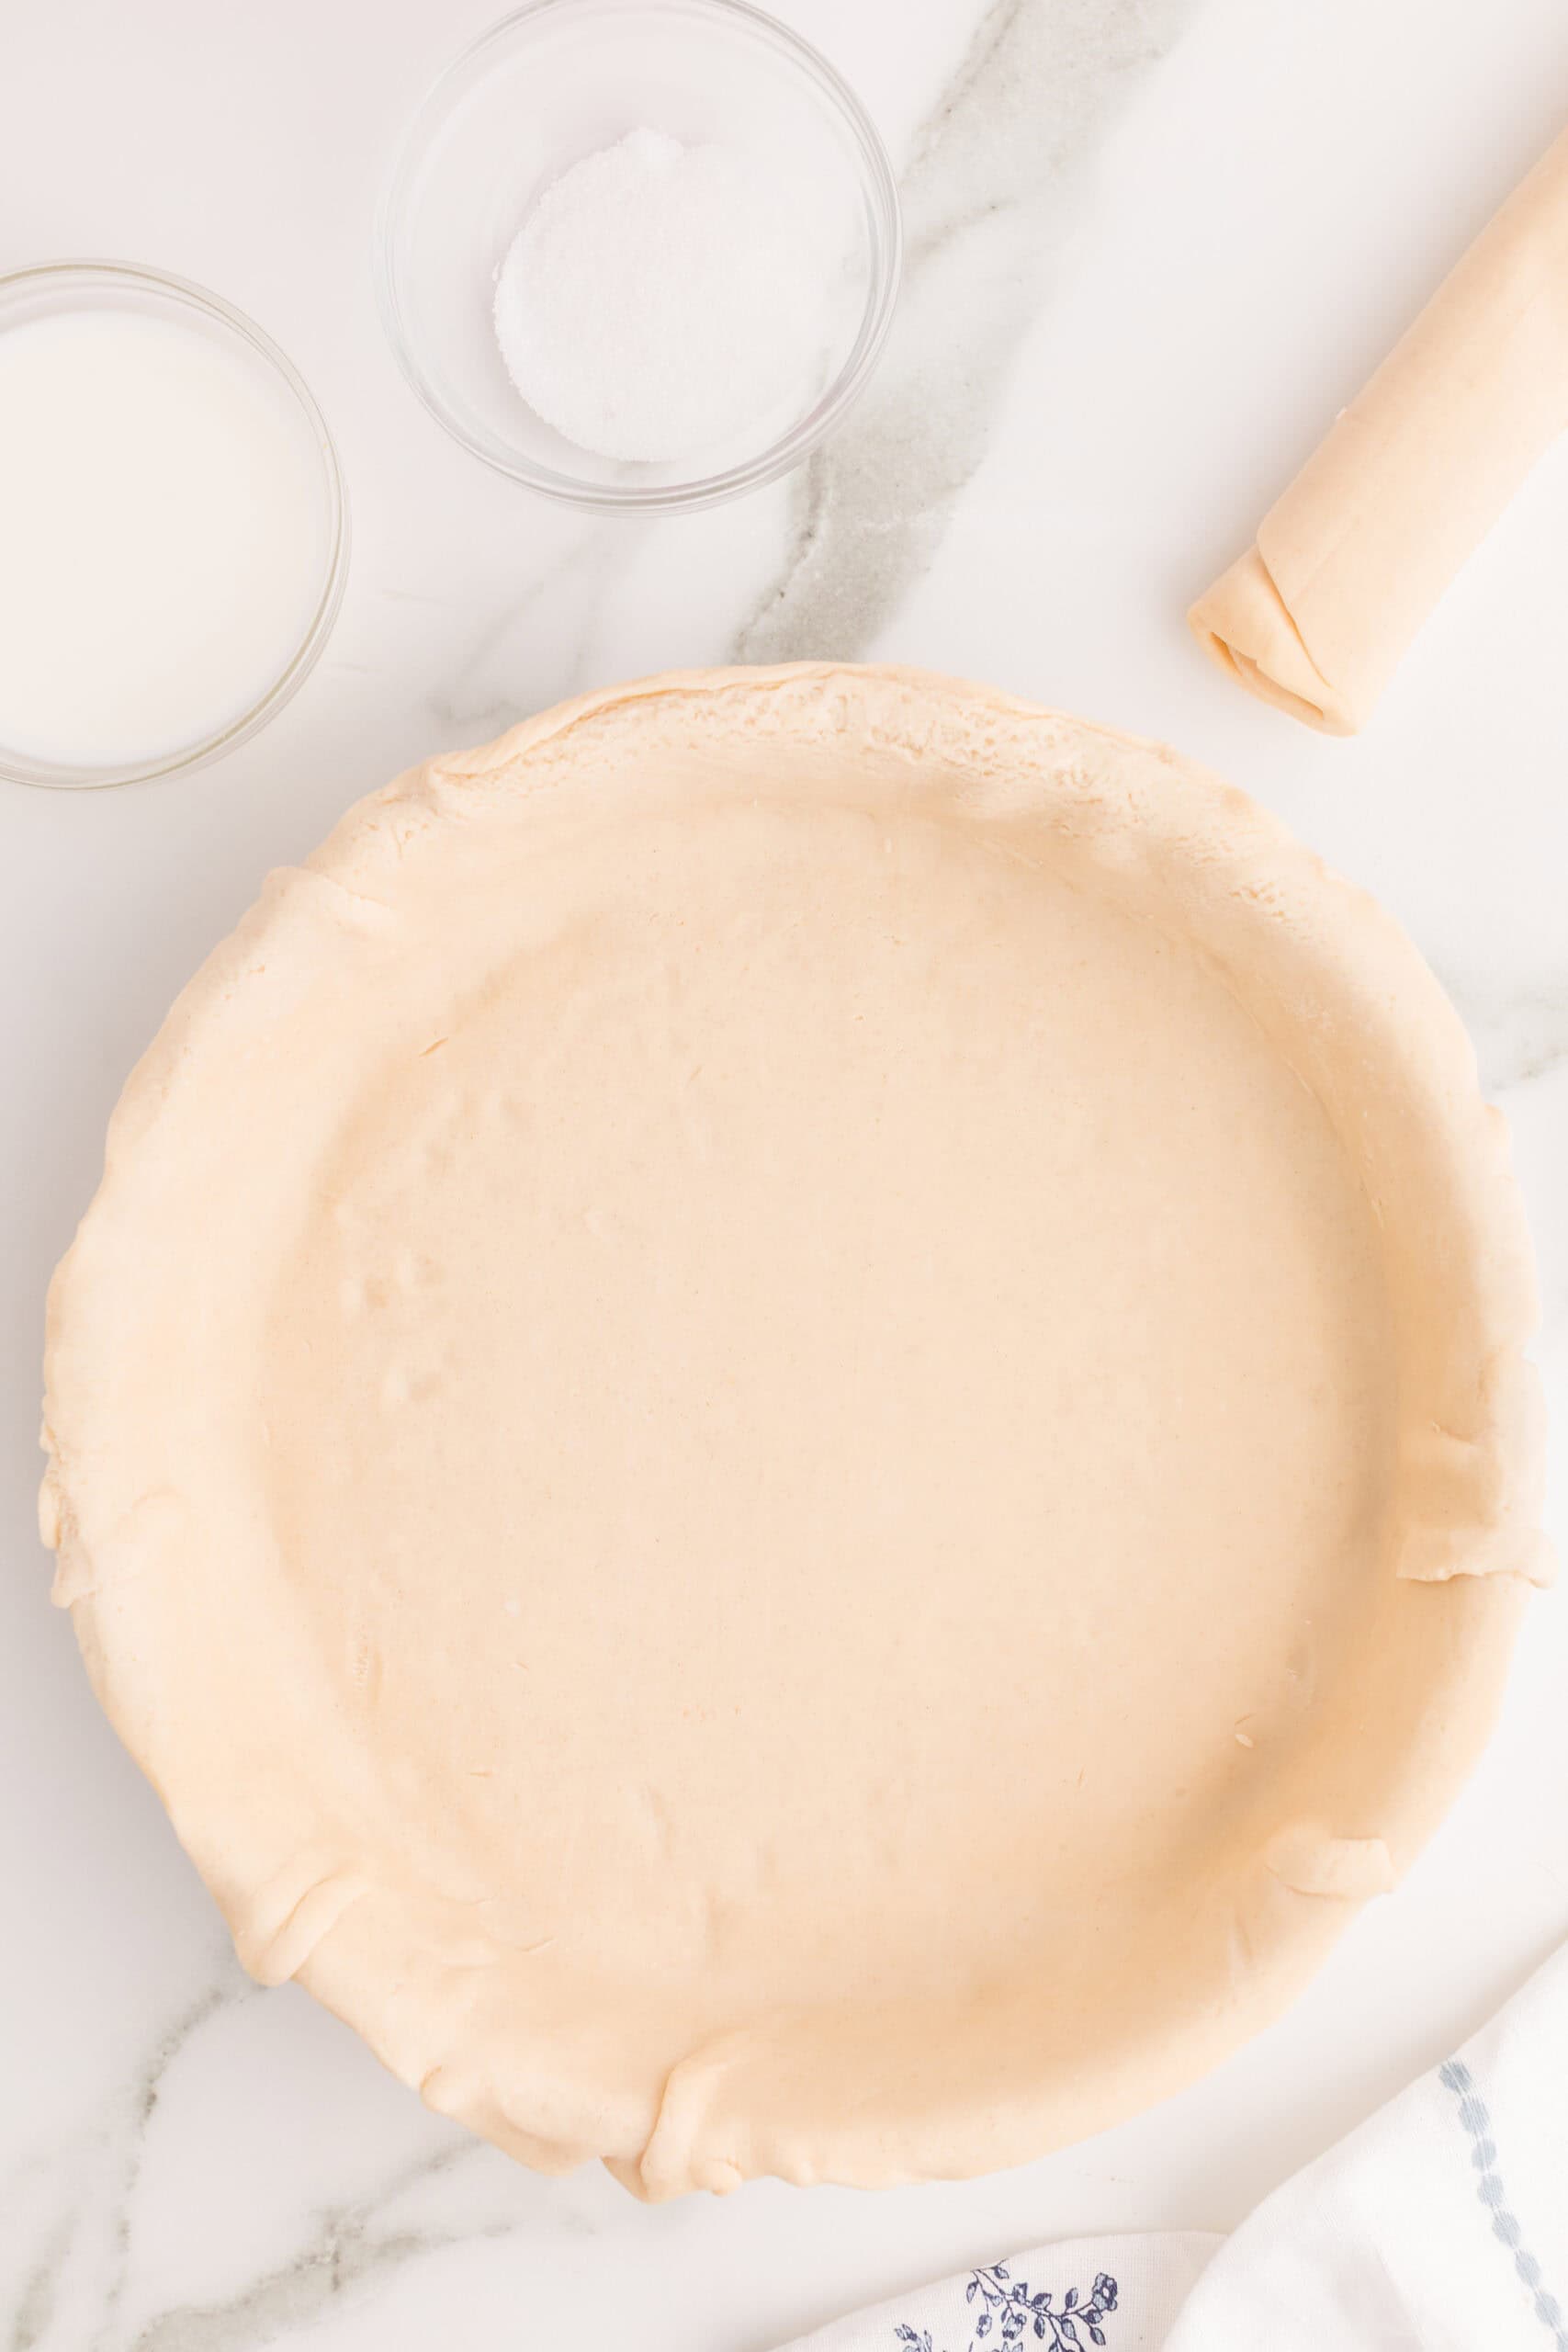
- Roll one pie crust out to an 11-inch circle. Place that dough circle in a deep dish pie plate. Use your fingers to press it into the bottom, sides, and especially the corners of the plate. (Yes, pie plates are round and don't have corners. I mean the place where the sides connect to the bottom. That's kind of a corner.)

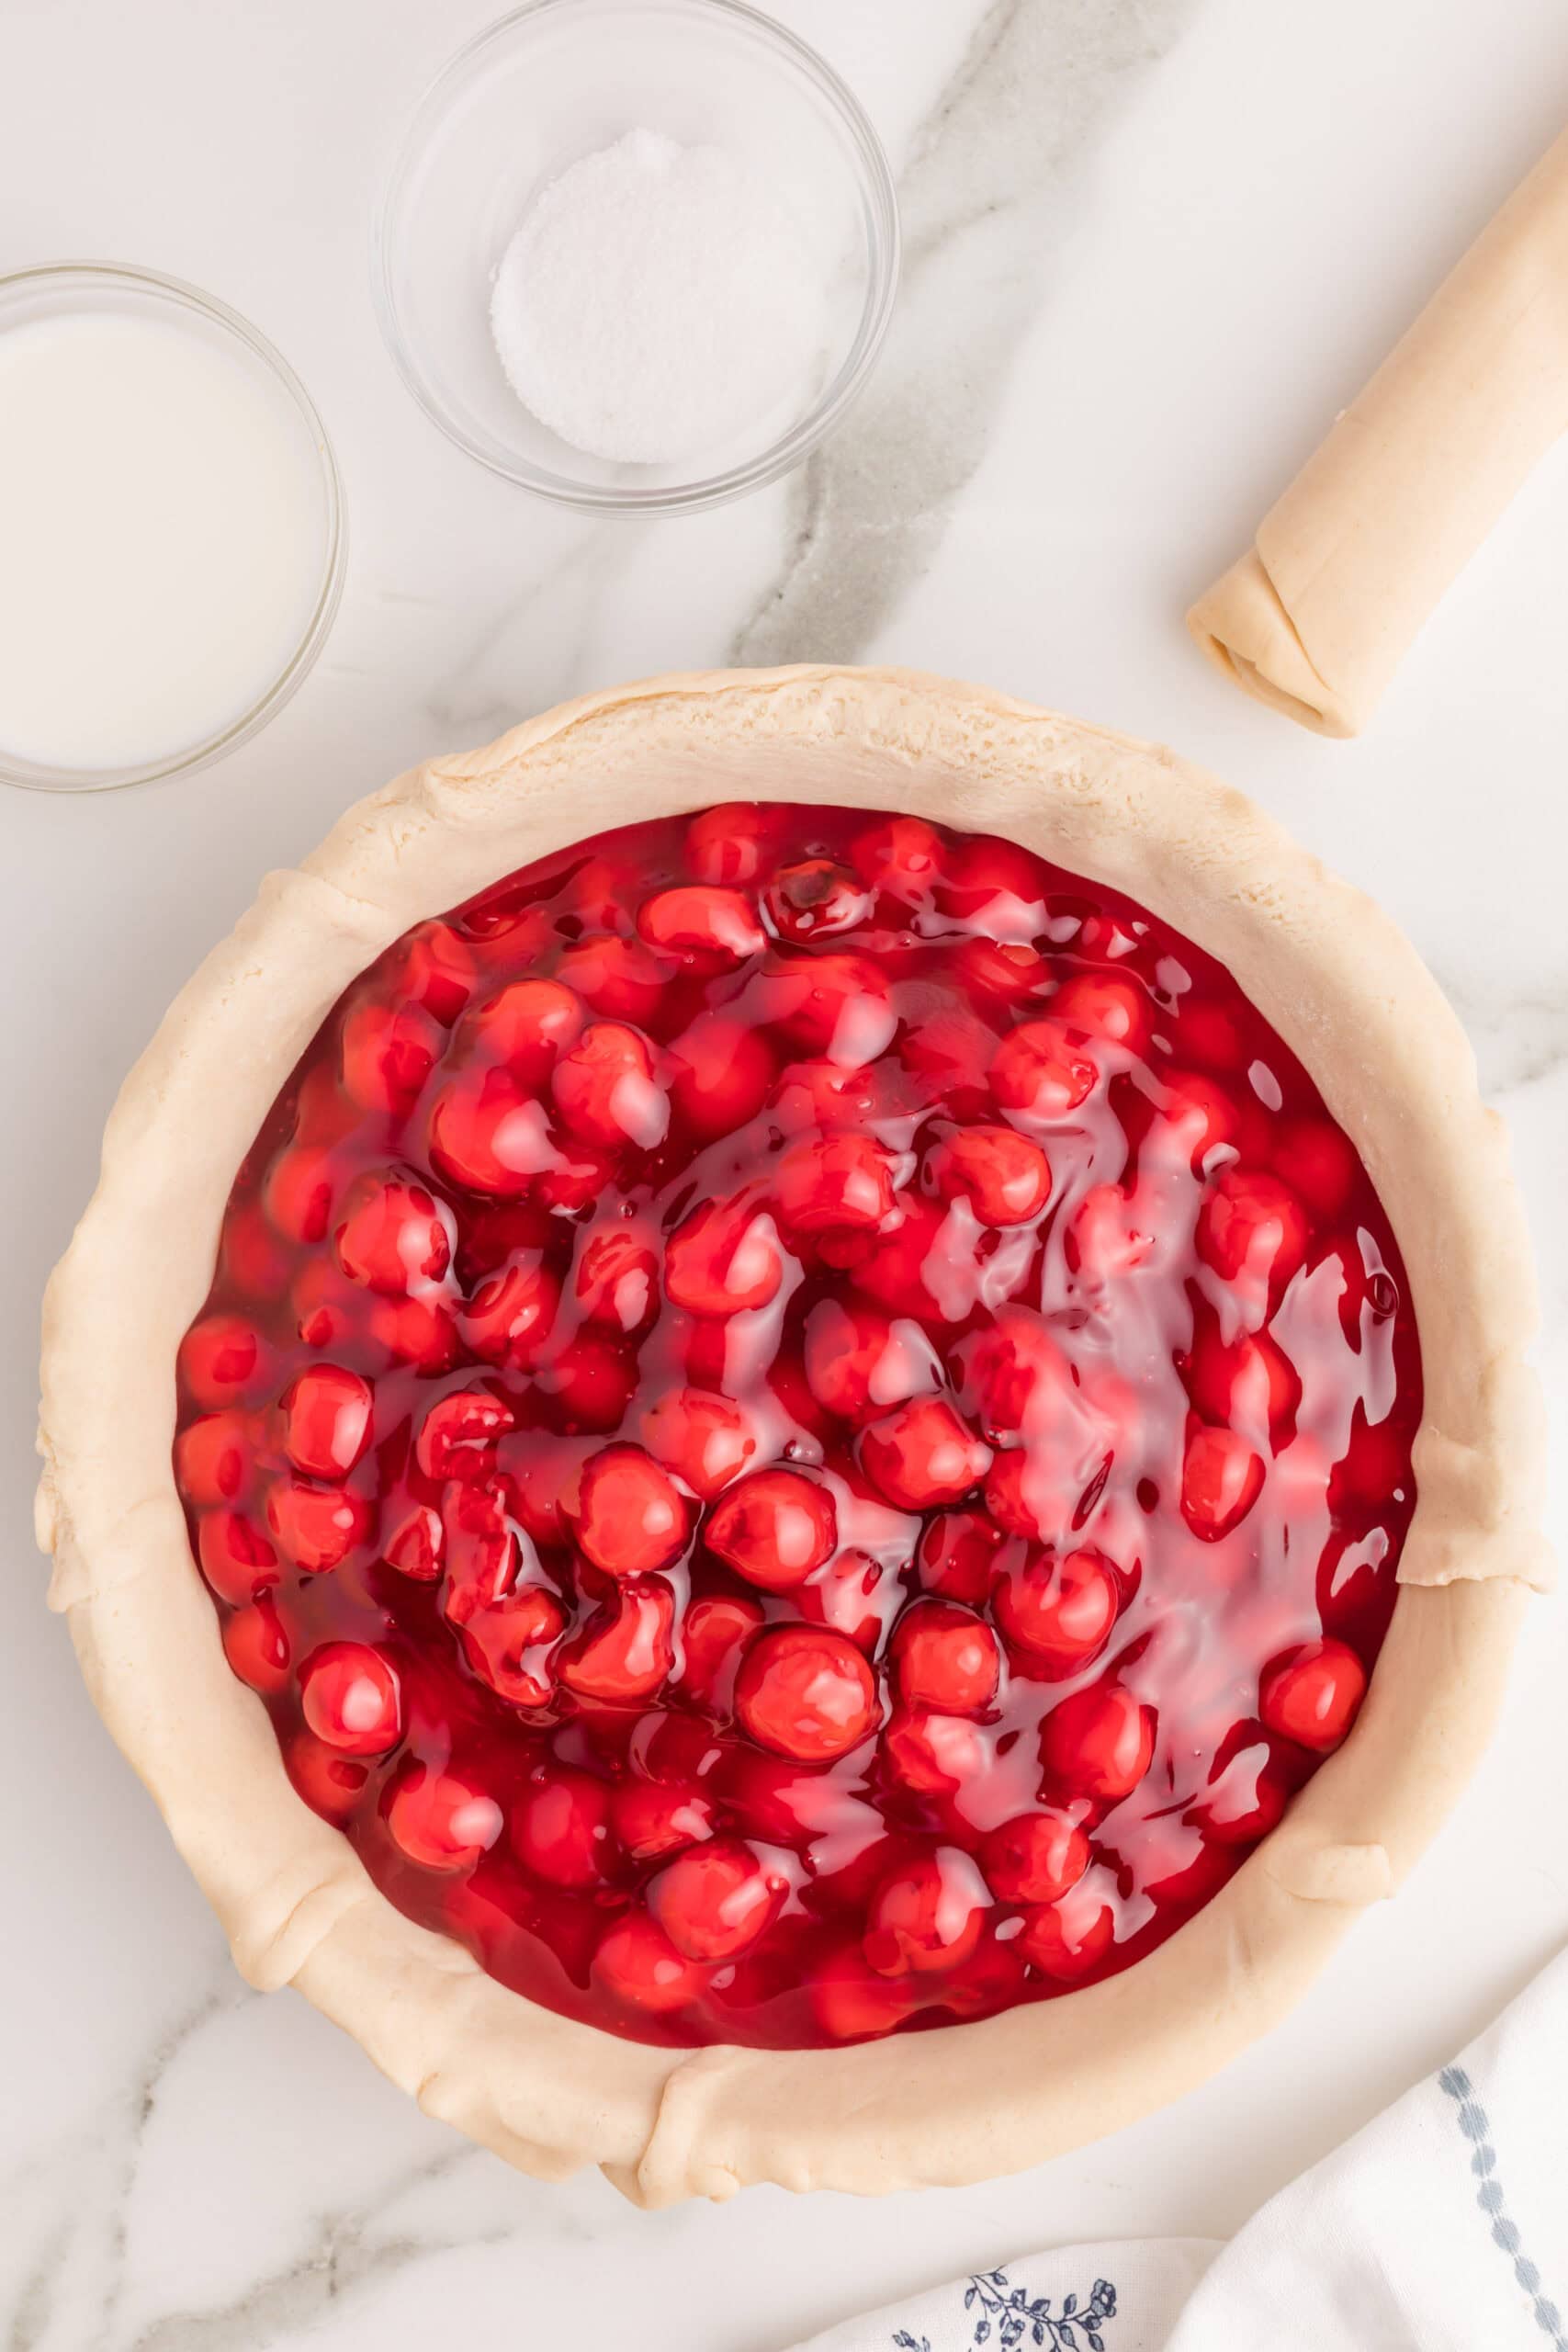
- Open the cans of pie filling and scrape it into the pie plate. Add the almond extract and mix it with the cherries and juice. Smooth it all out with a spatula.
- Lay the remaining pie crust on a large cutting board (or directly on the counter). Roll it out to about 10 inches. Make five cut outs (these will allow the steam to leak out of the pie; without them, the top crust will have big air bubbles trapped under it). If you don't have a cookie cutter, you could cut a couple of Xs or even a couple of slits with a sharp knife after you've put the top crust on the pie. Carefully lay the second pie crust on top of the pie filling, and press the edges together. You may need to use a bit of water or egg to get them to stick together nicely. Cut the top crust so that it's even with the bottom crust, and finish the edge however you want.Or read on to make the pretty lattice crust.
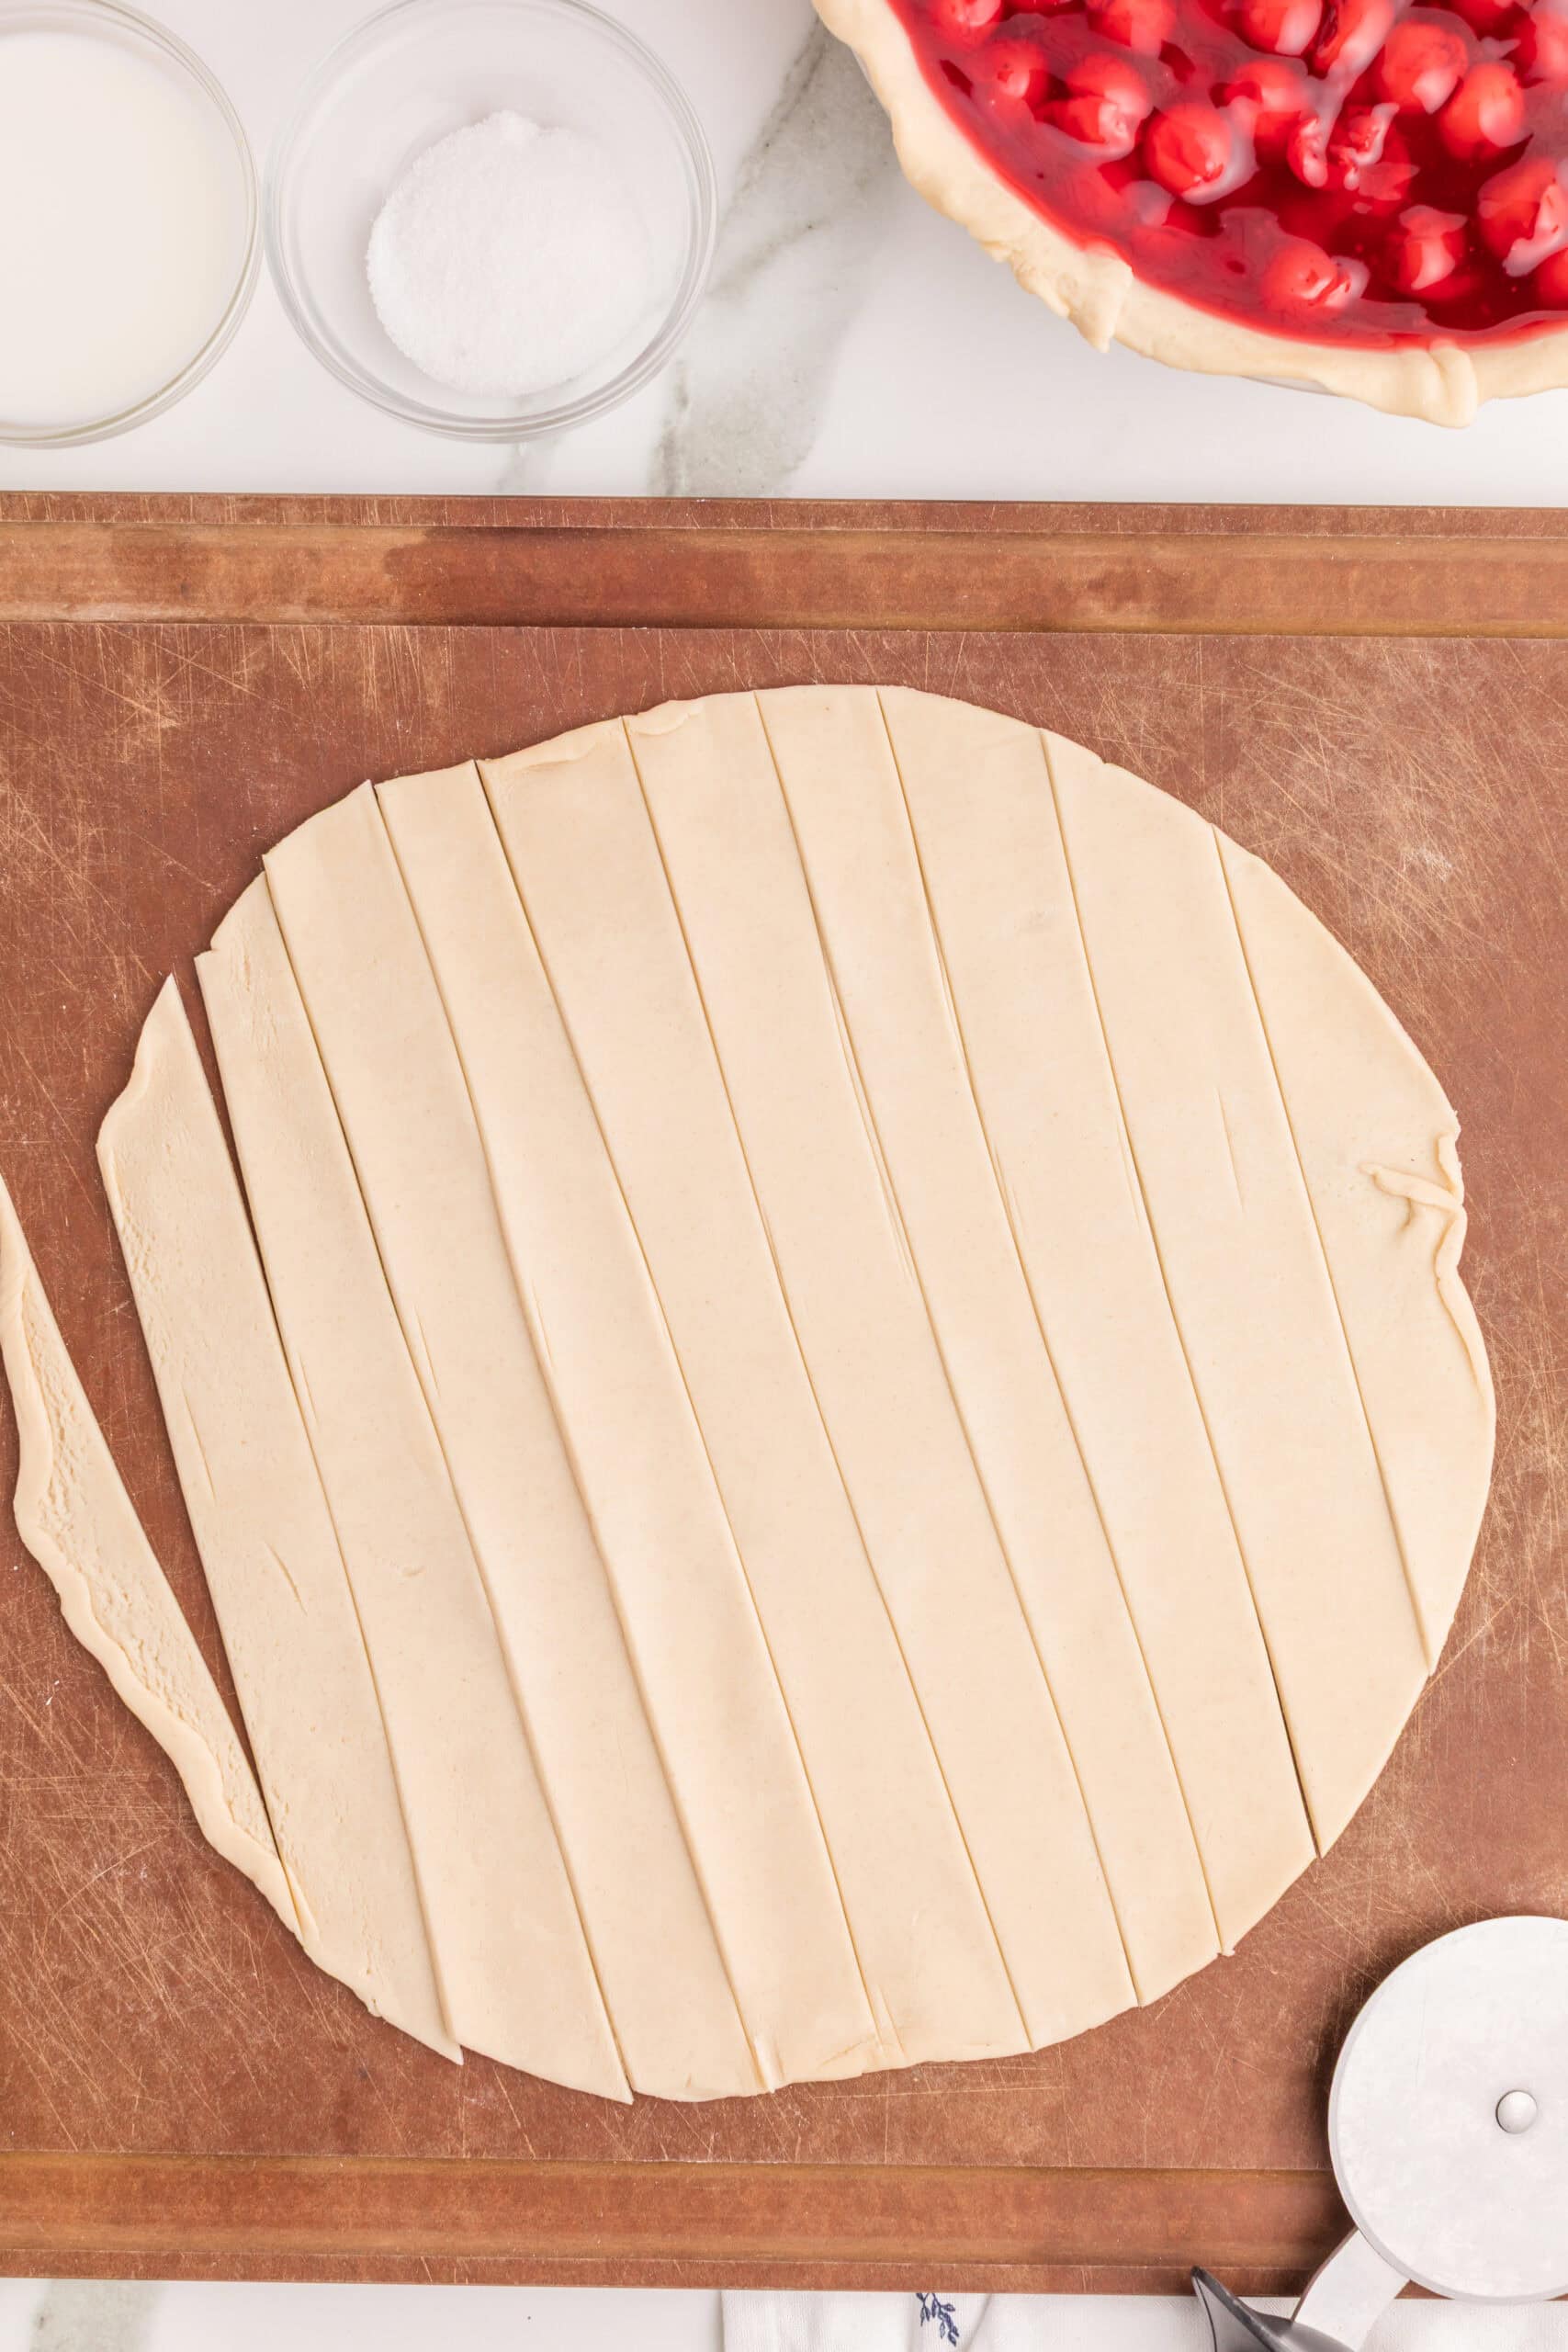
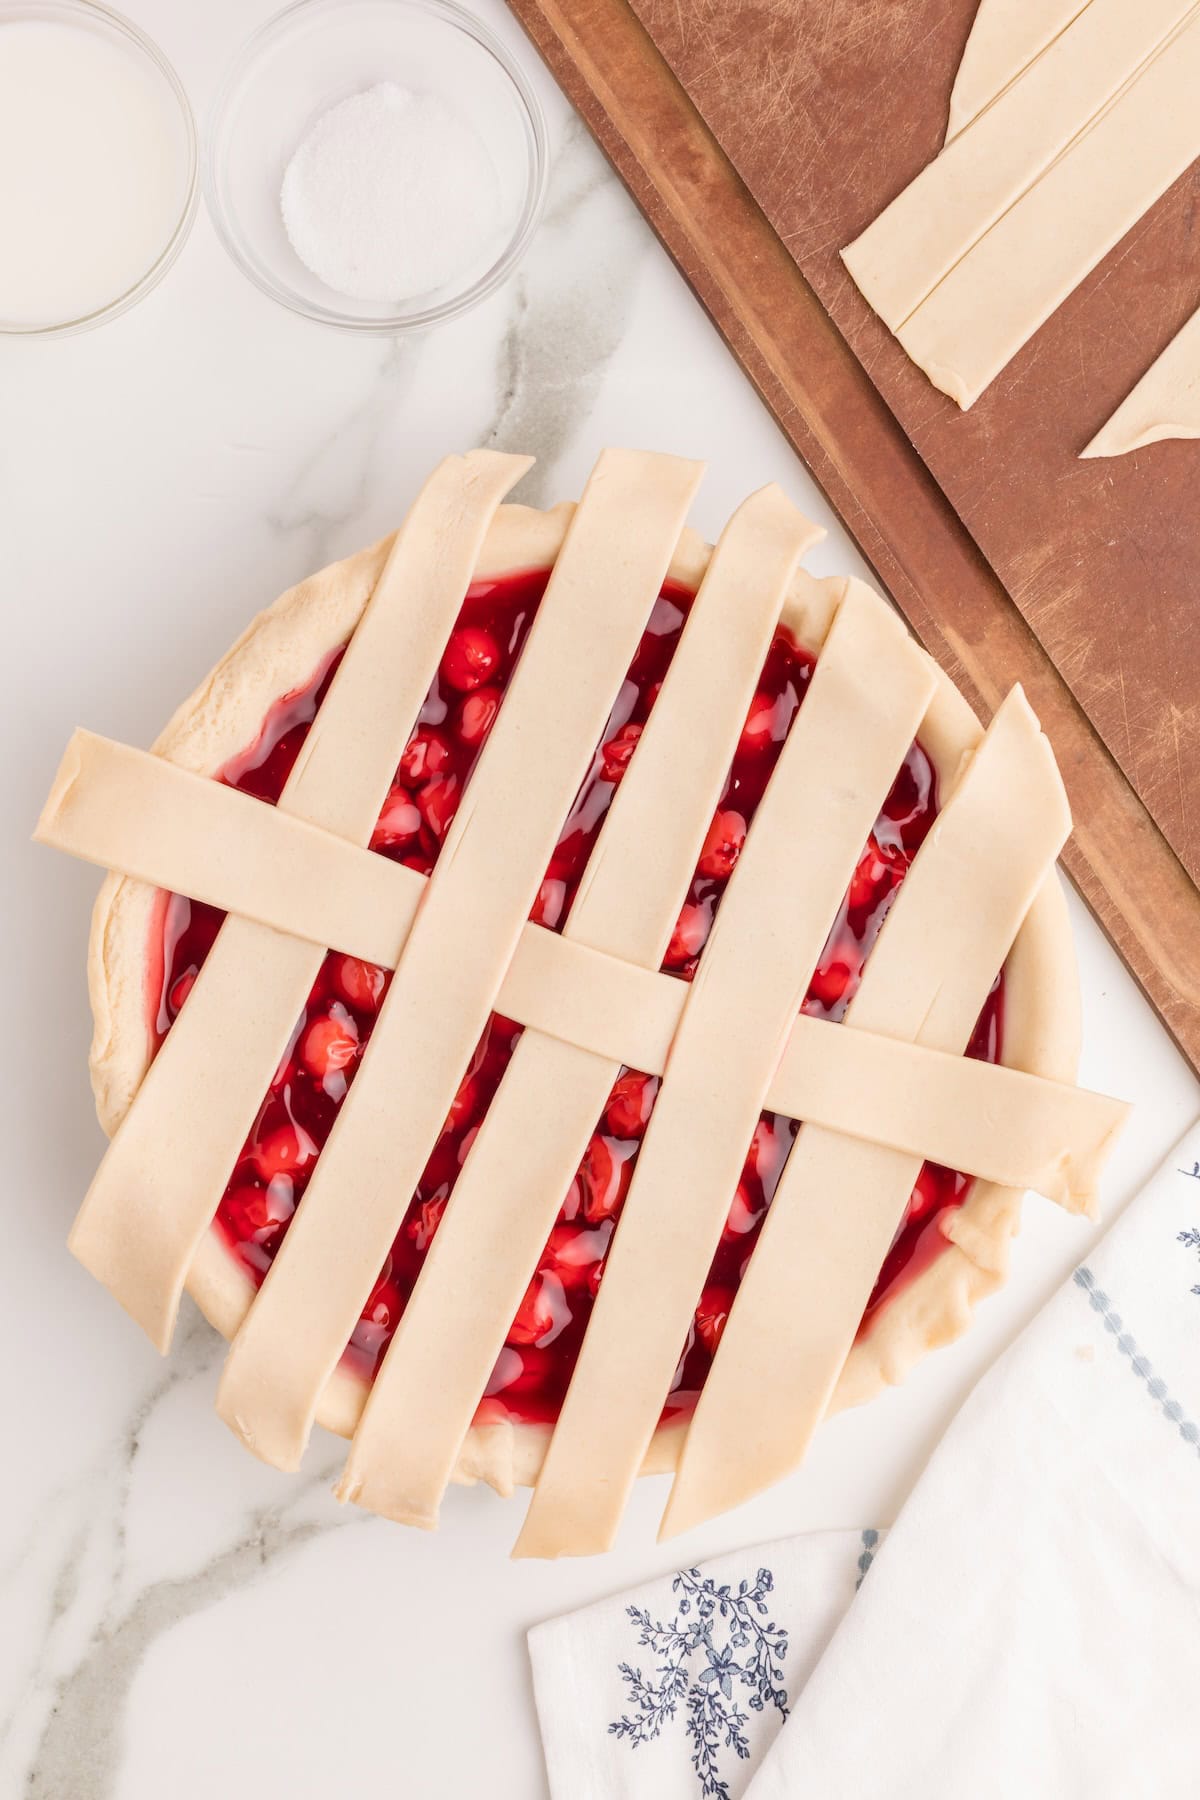
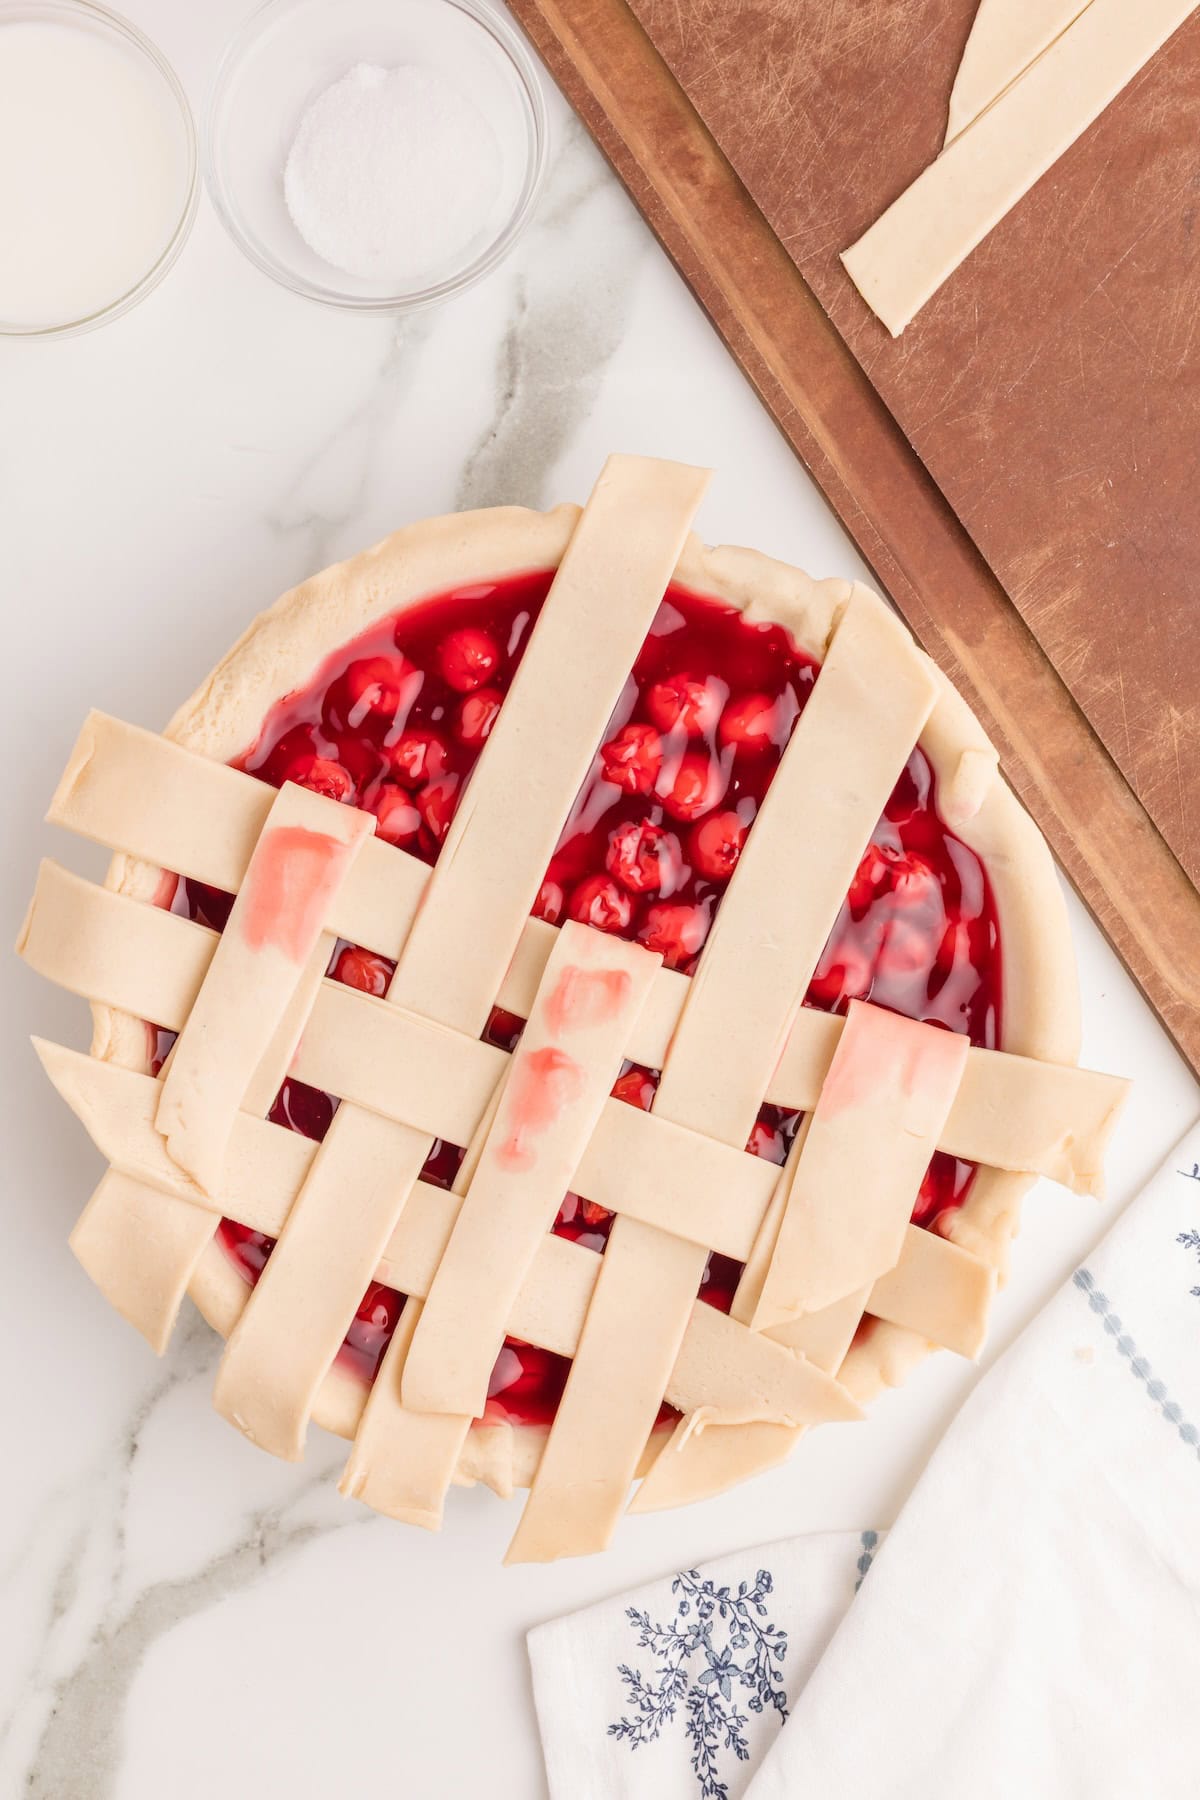
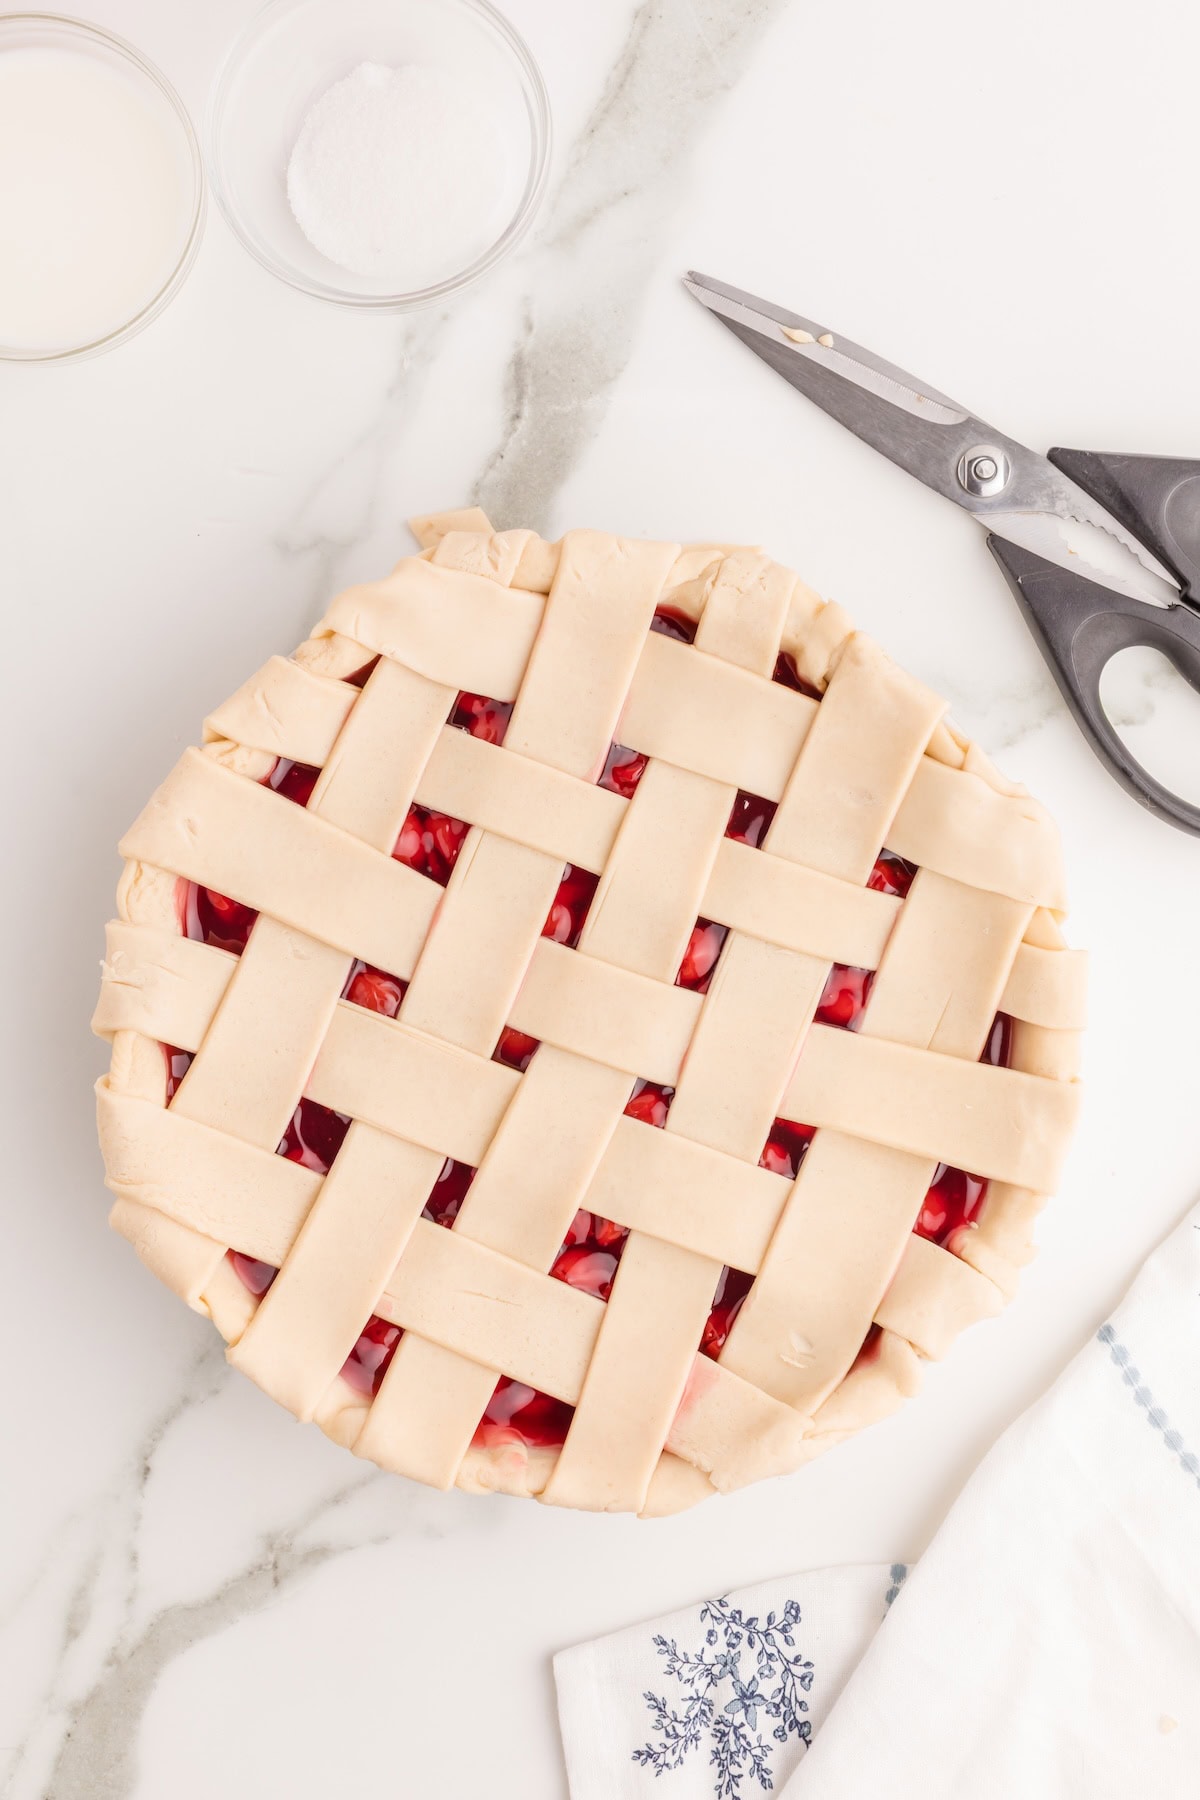
- Cut the top crust into 10-11 long strips using a pizza cutter or a sharp knife. Try to get them all the same width but that's not vital. (See my strips below.)
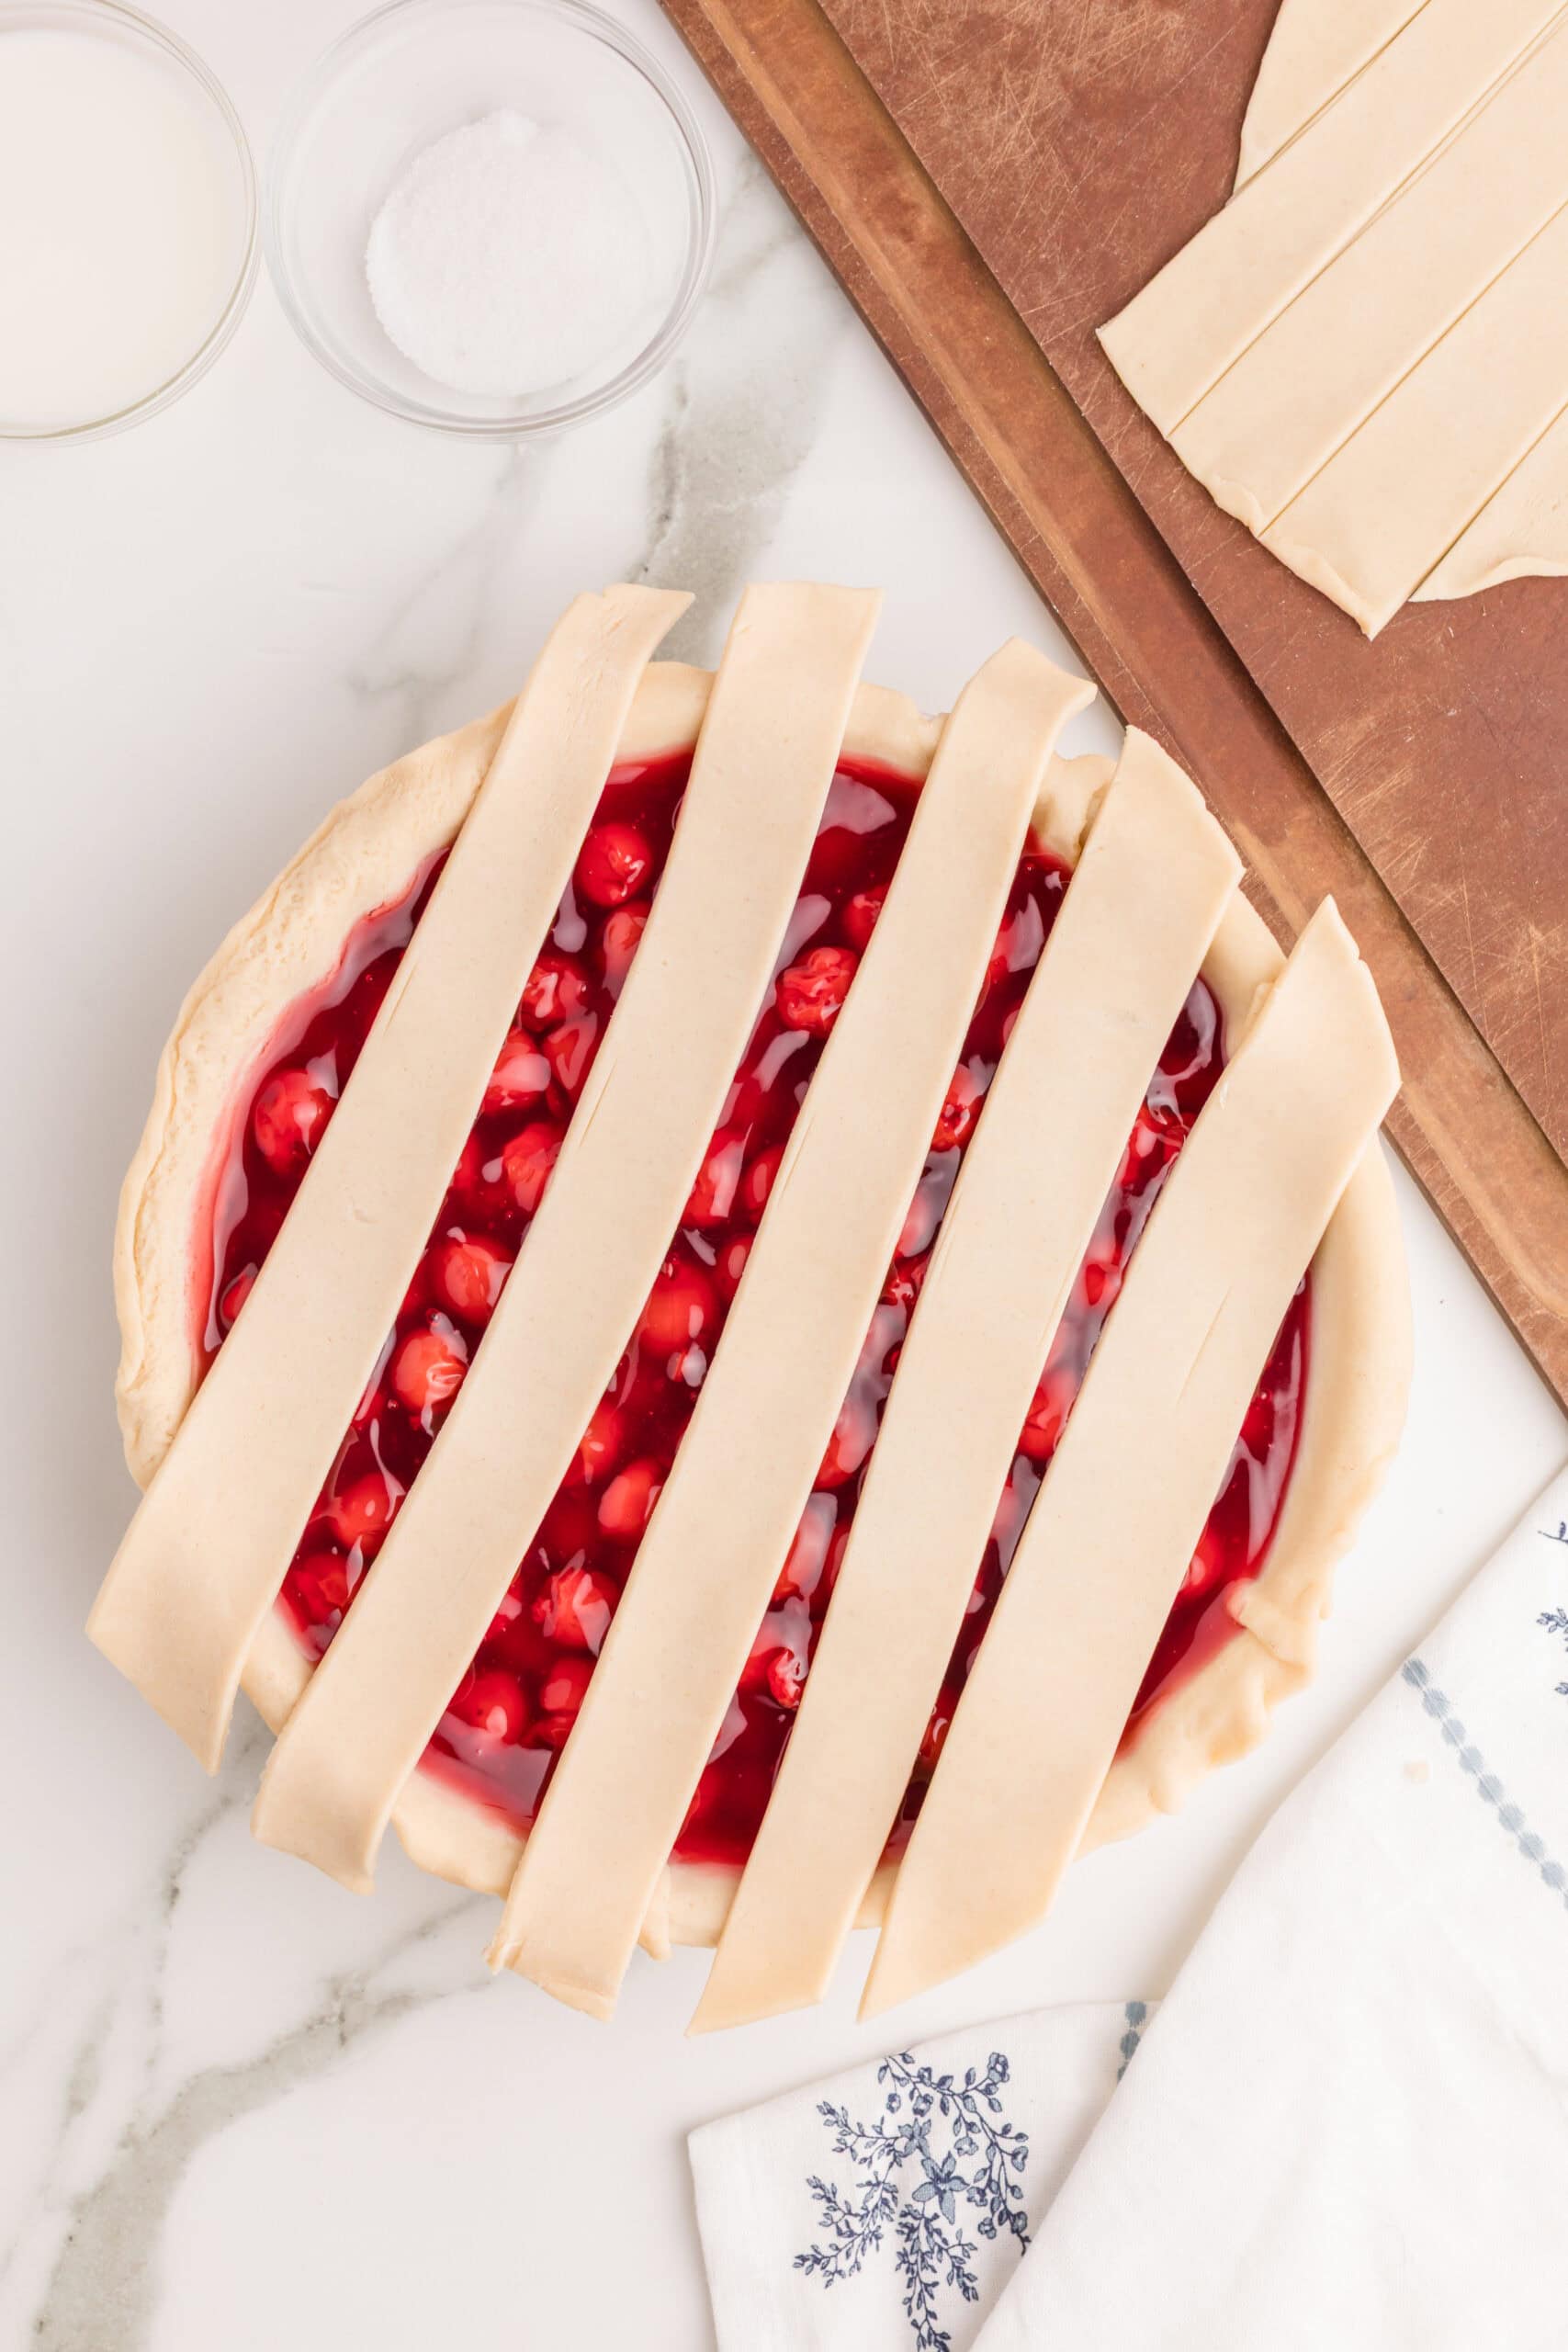
- Lay half of the strips across the pie, separating them as if you're leaving room for the other strips (which you kind of are).
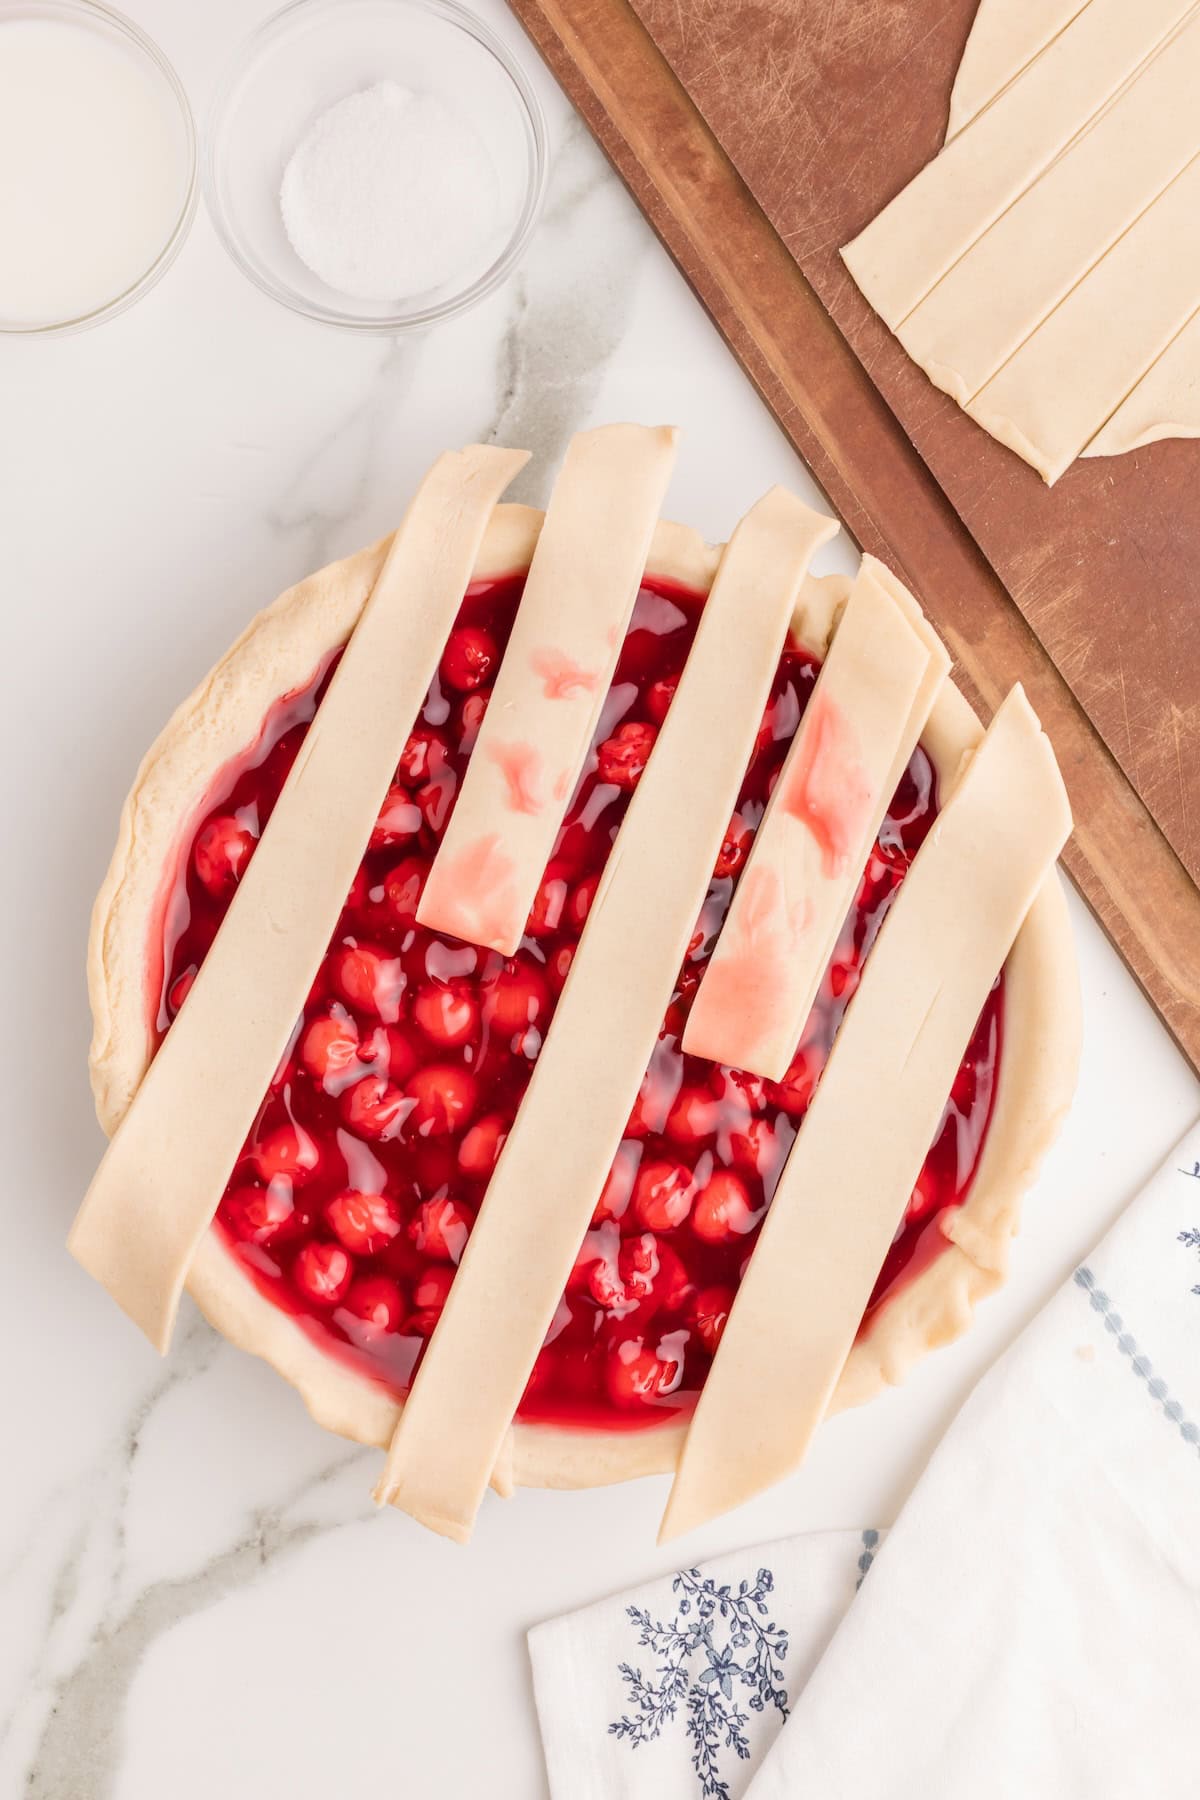
- Lift up every other strip and fold it to middle of the pie, overlapping itself to the top of the pie, as shown below.

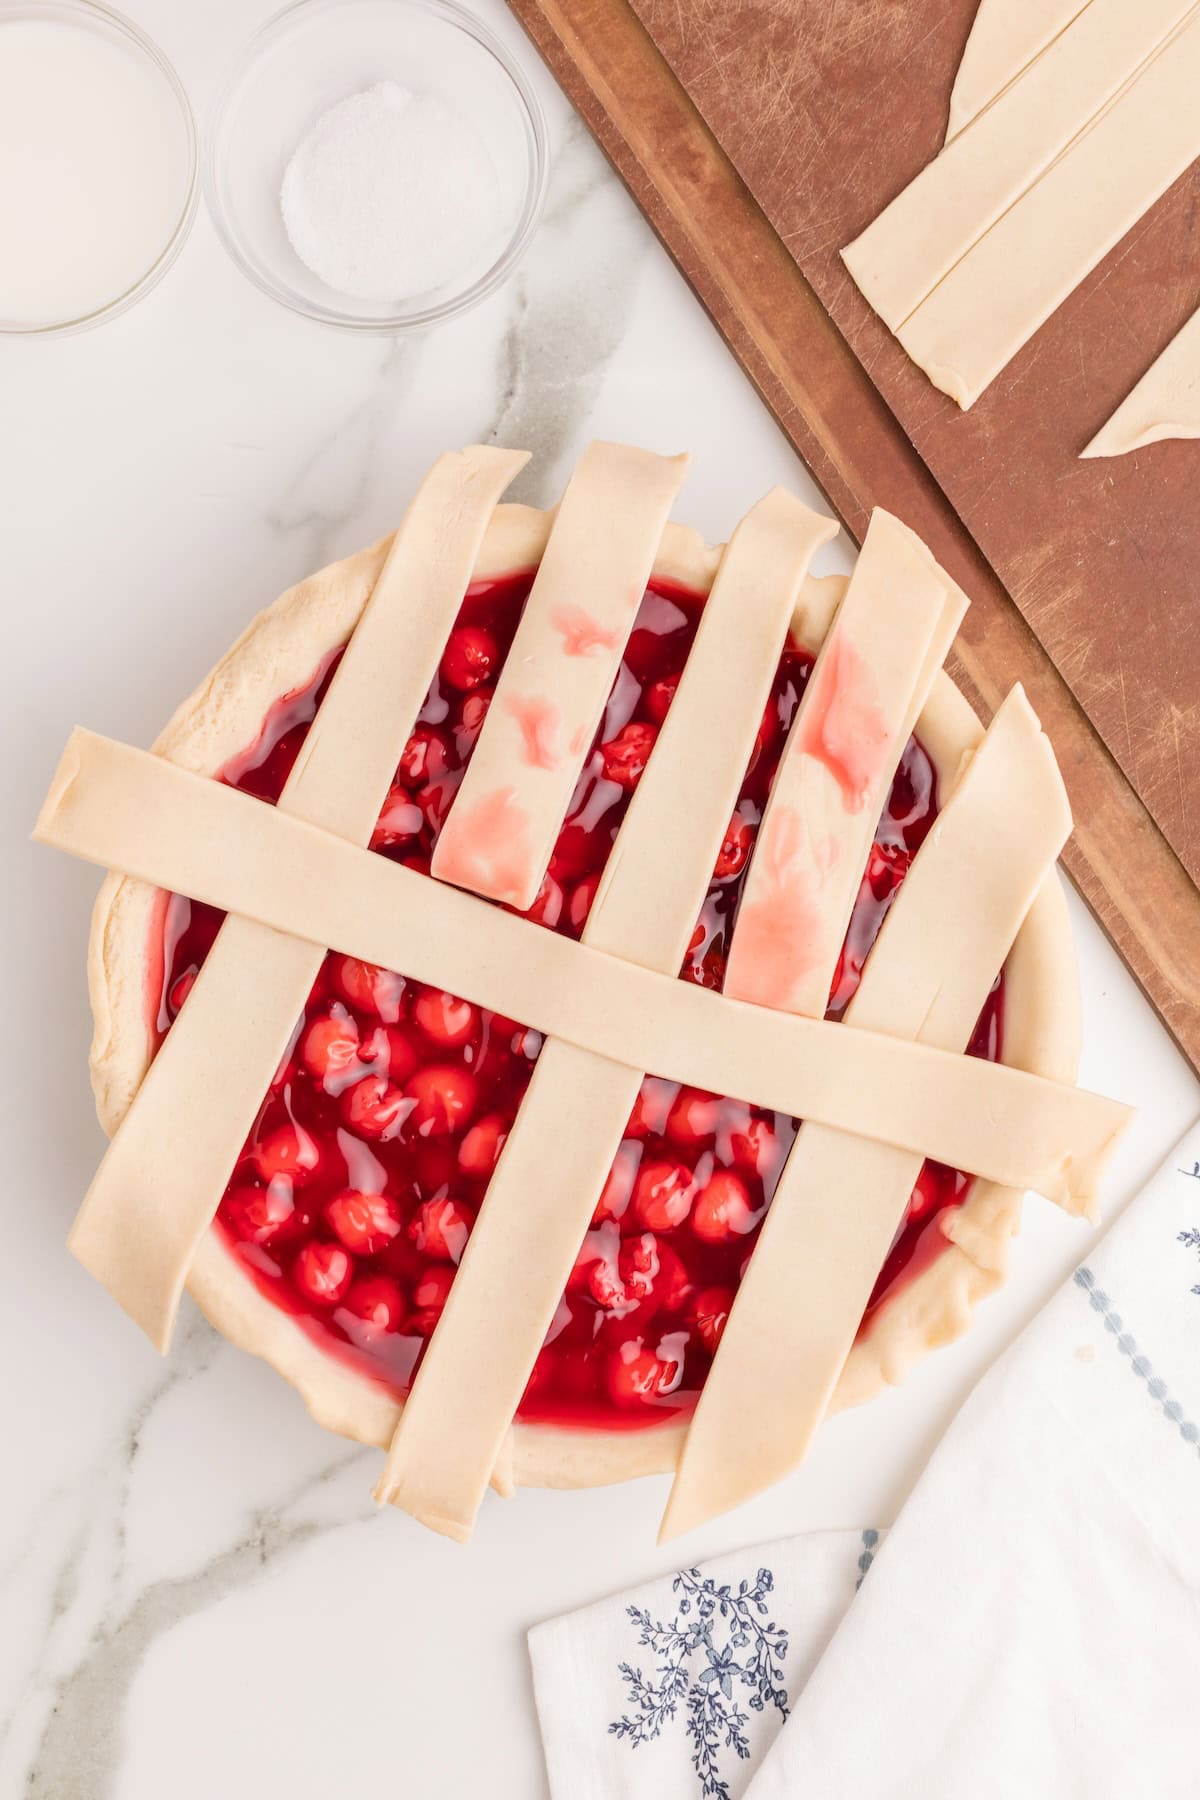
- Lay the longest of the remaining crust strips across the center of the pie in the opposite direction of the first set.
- Unfold the folded strips so they lay across the one you just placed.
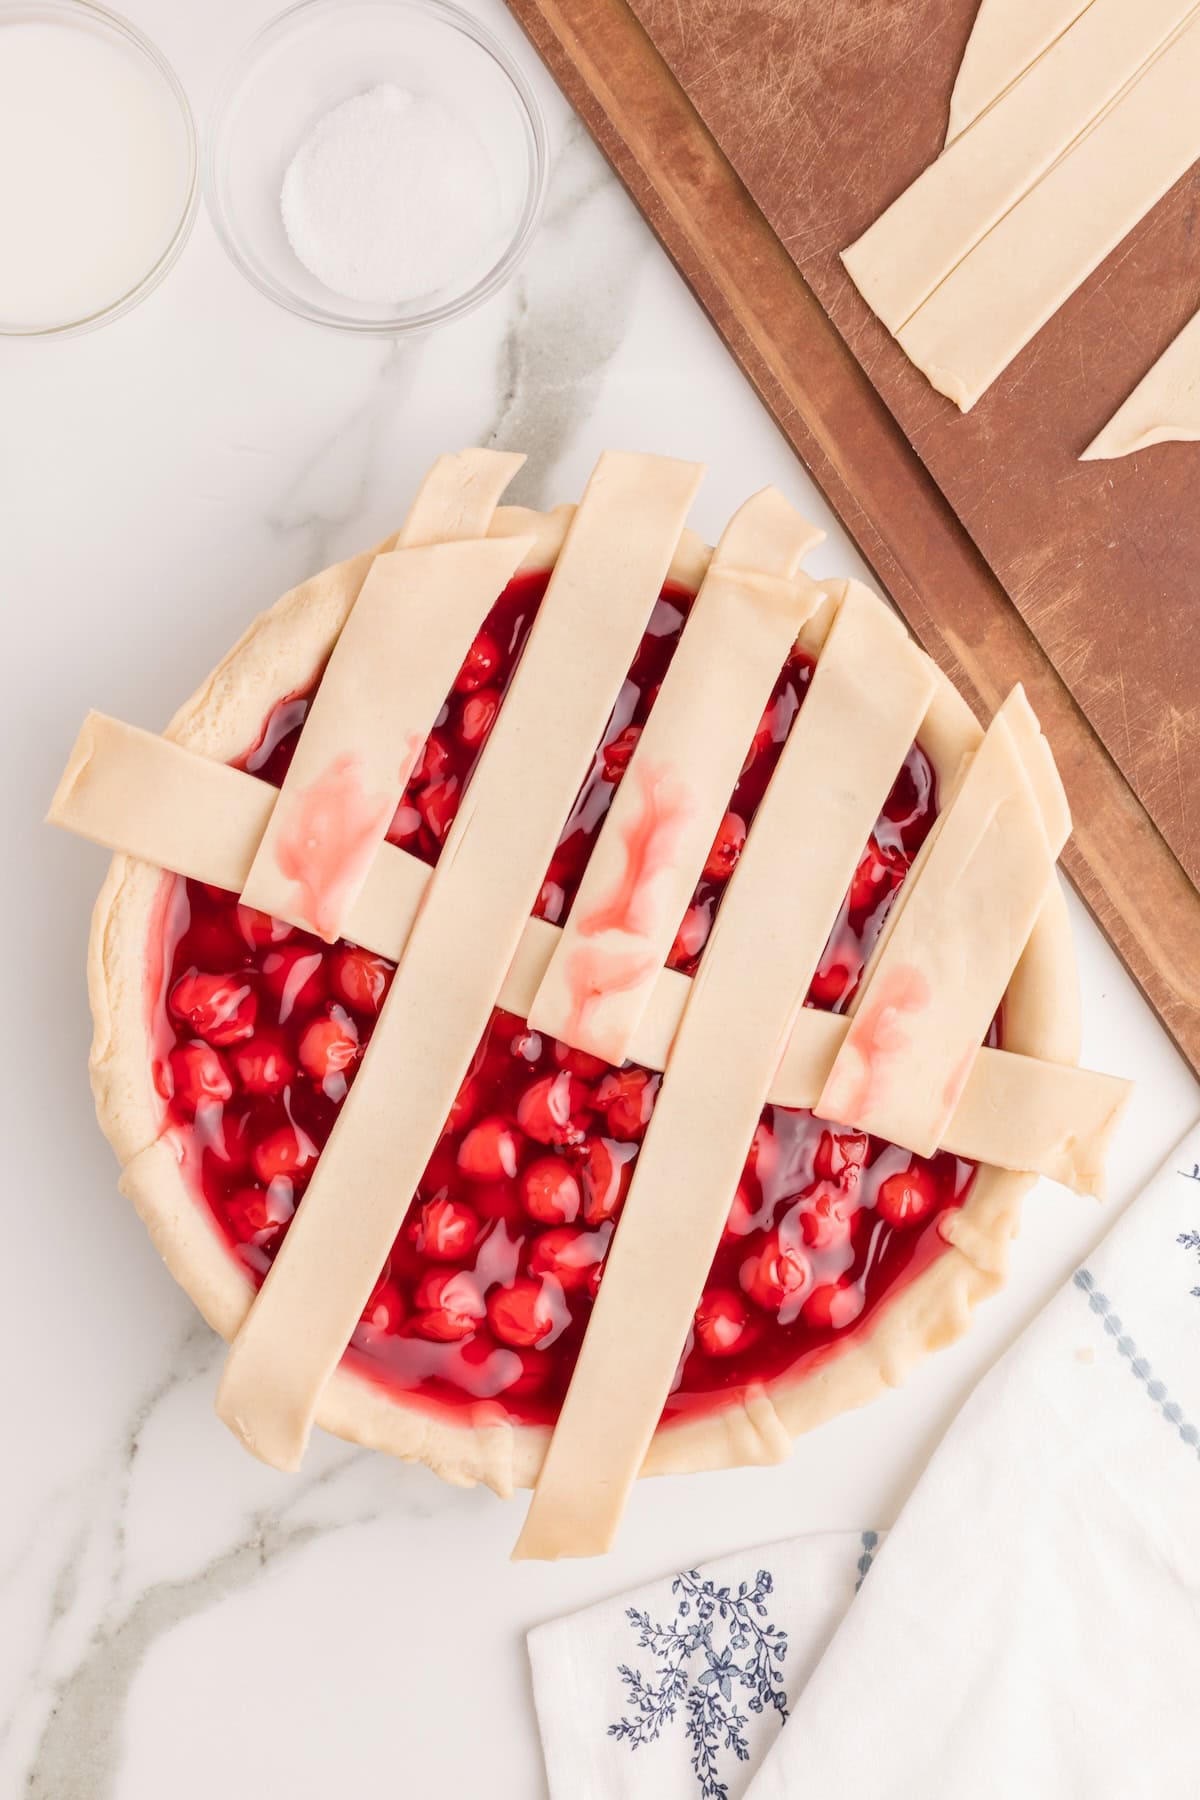
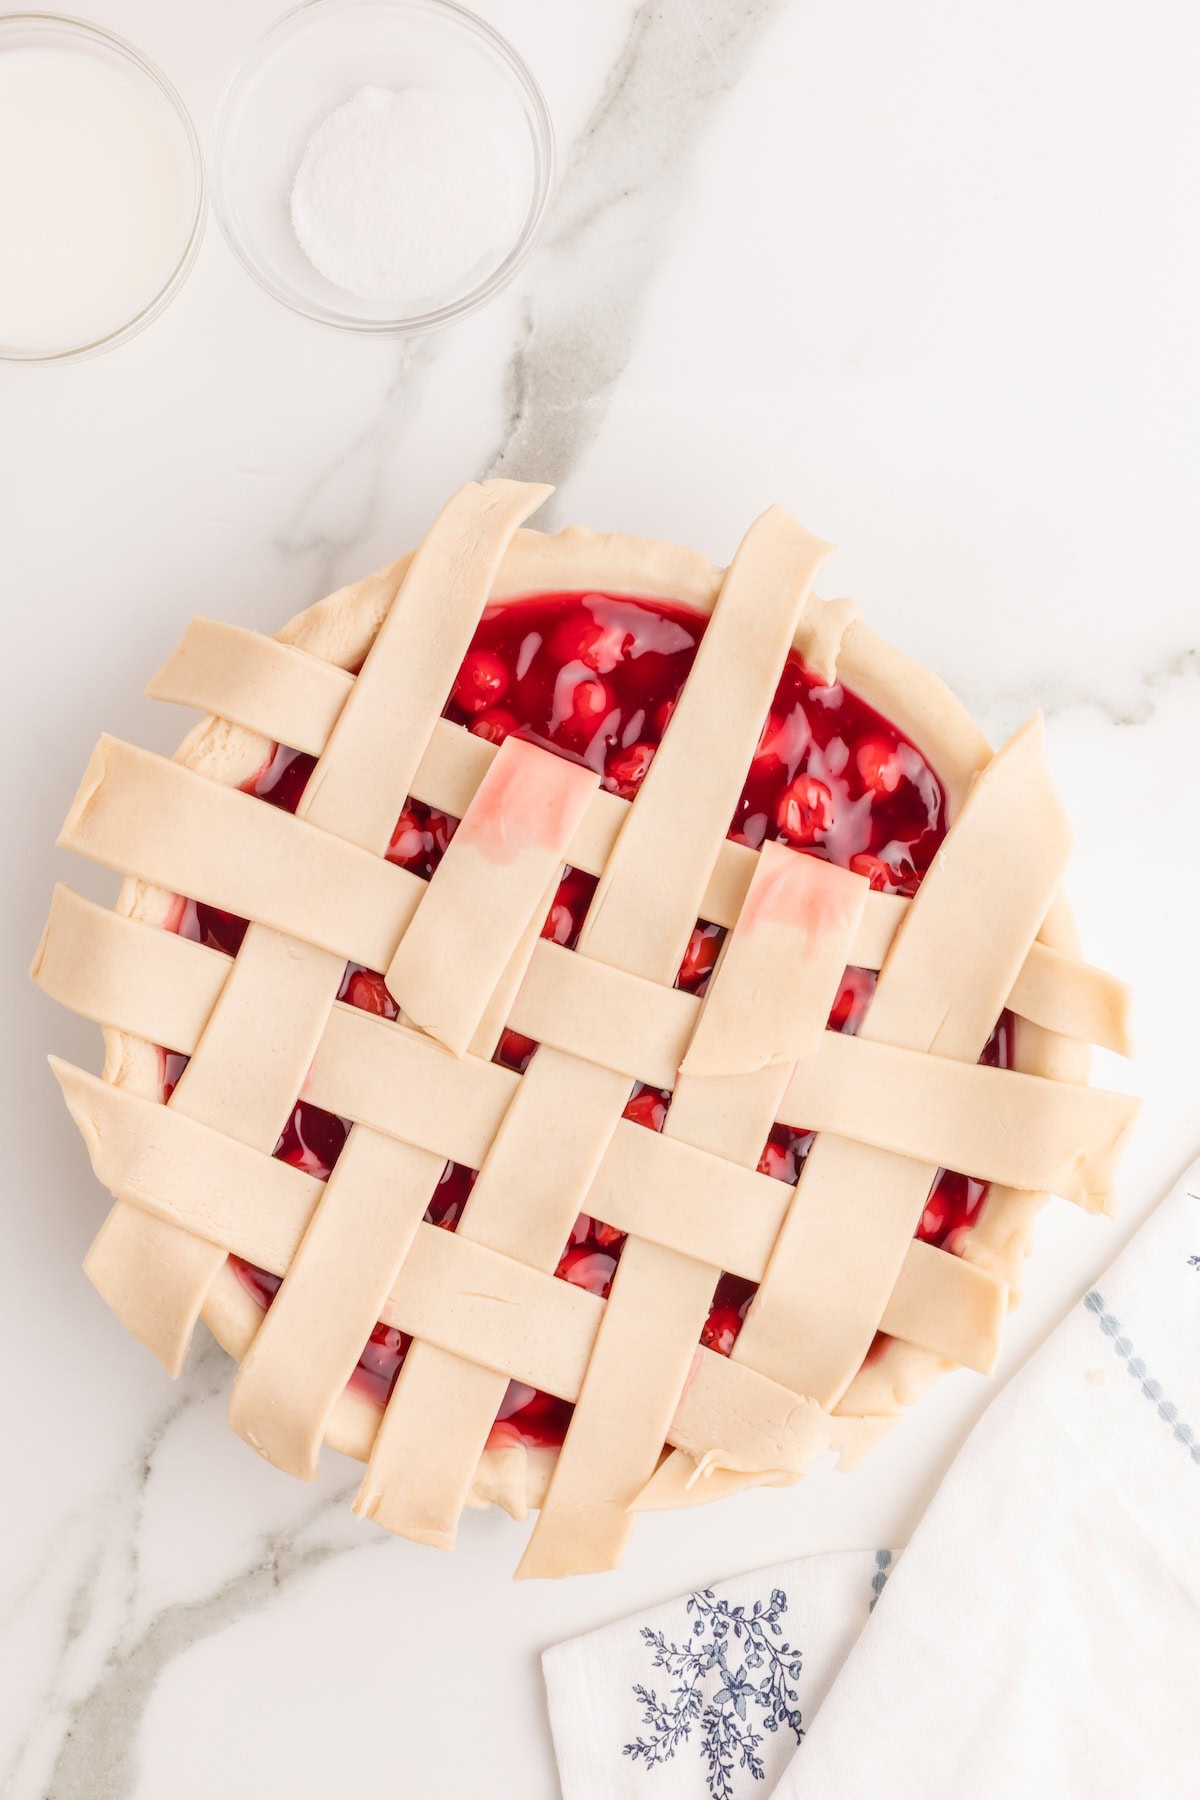
- Now, fold the alternating strips to the top of the pie. These should be the ones that are under the strip you just placed. Just fold them upwards as far as you can without moving the horizontal strip.
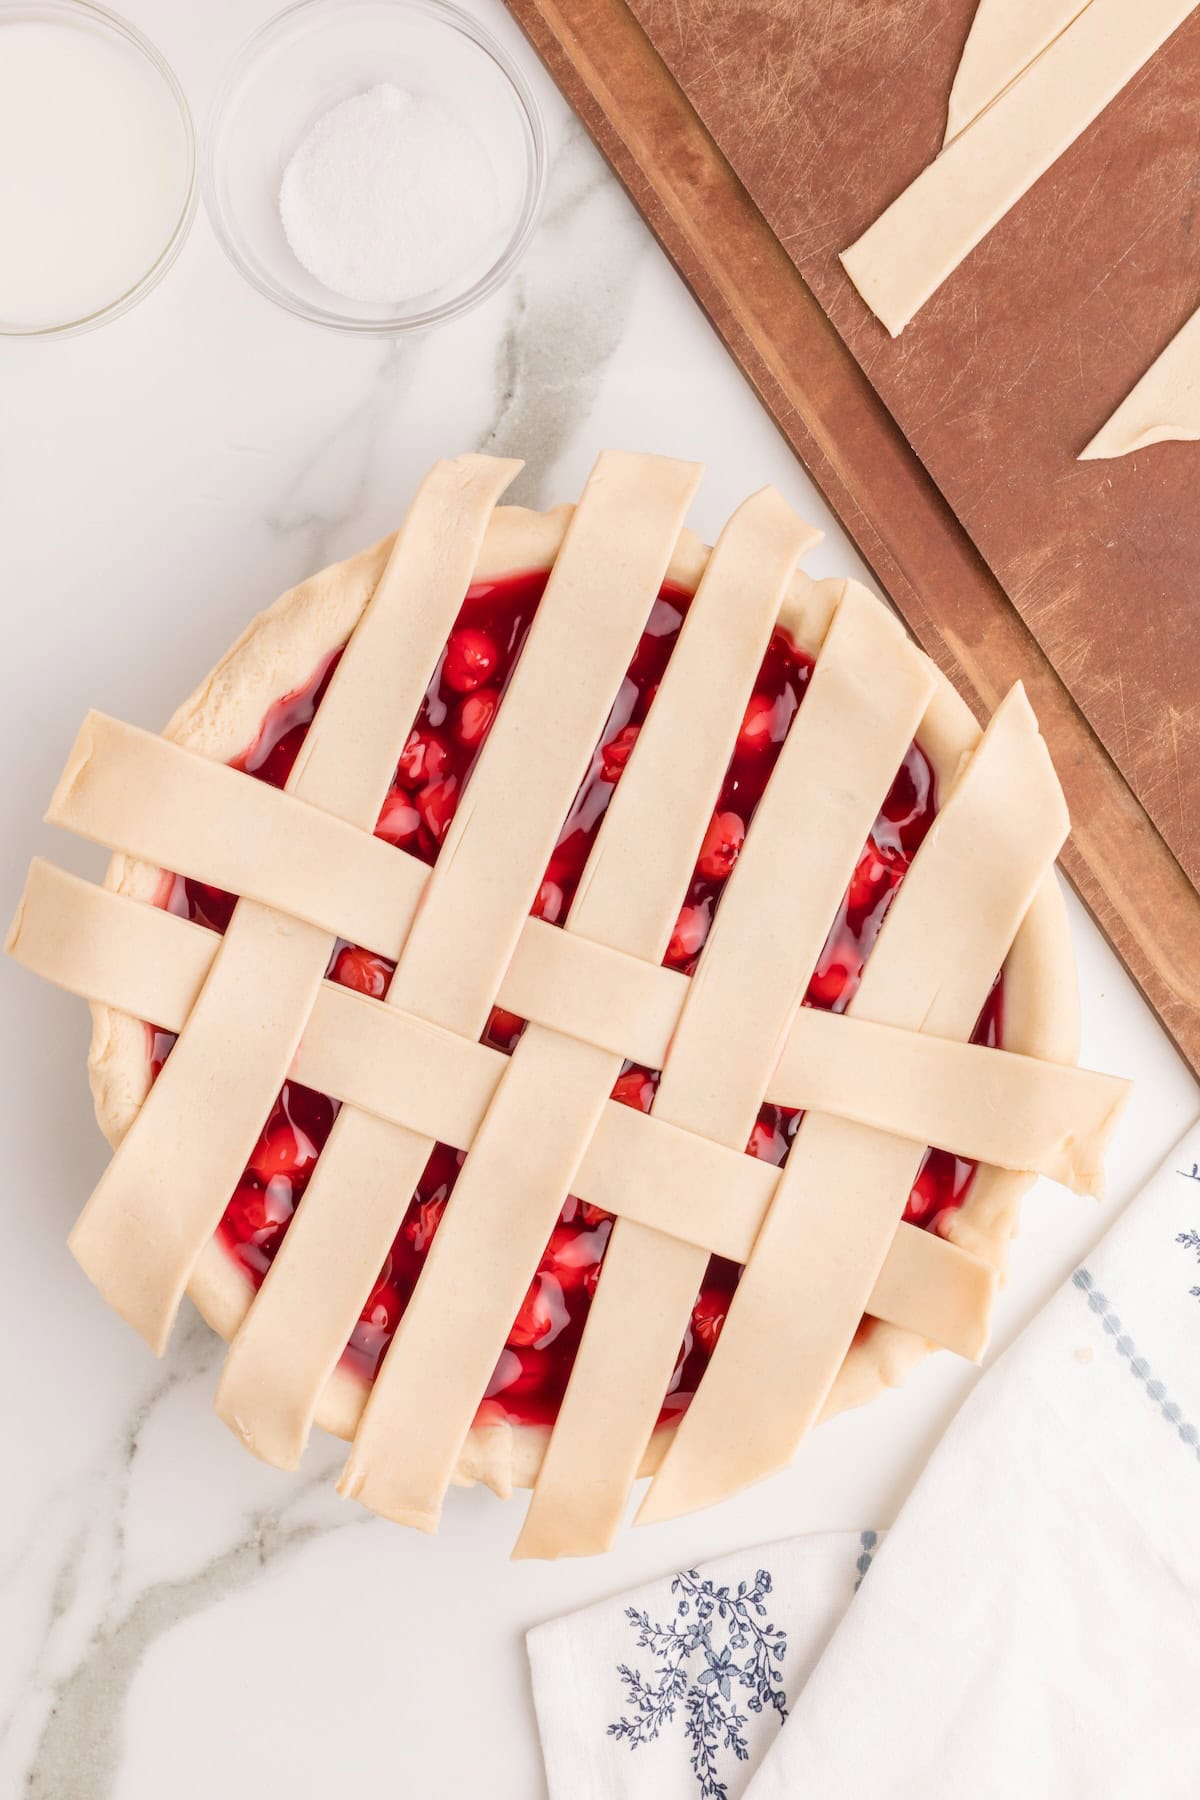
- Place the next longest strip across the pie, next to the other horizontal one but not touching it. Unfold the strips across the new piece.
- Repeat this process one more time at the bottom of the pie, only folding those strips that will cross the last one at the bottom.
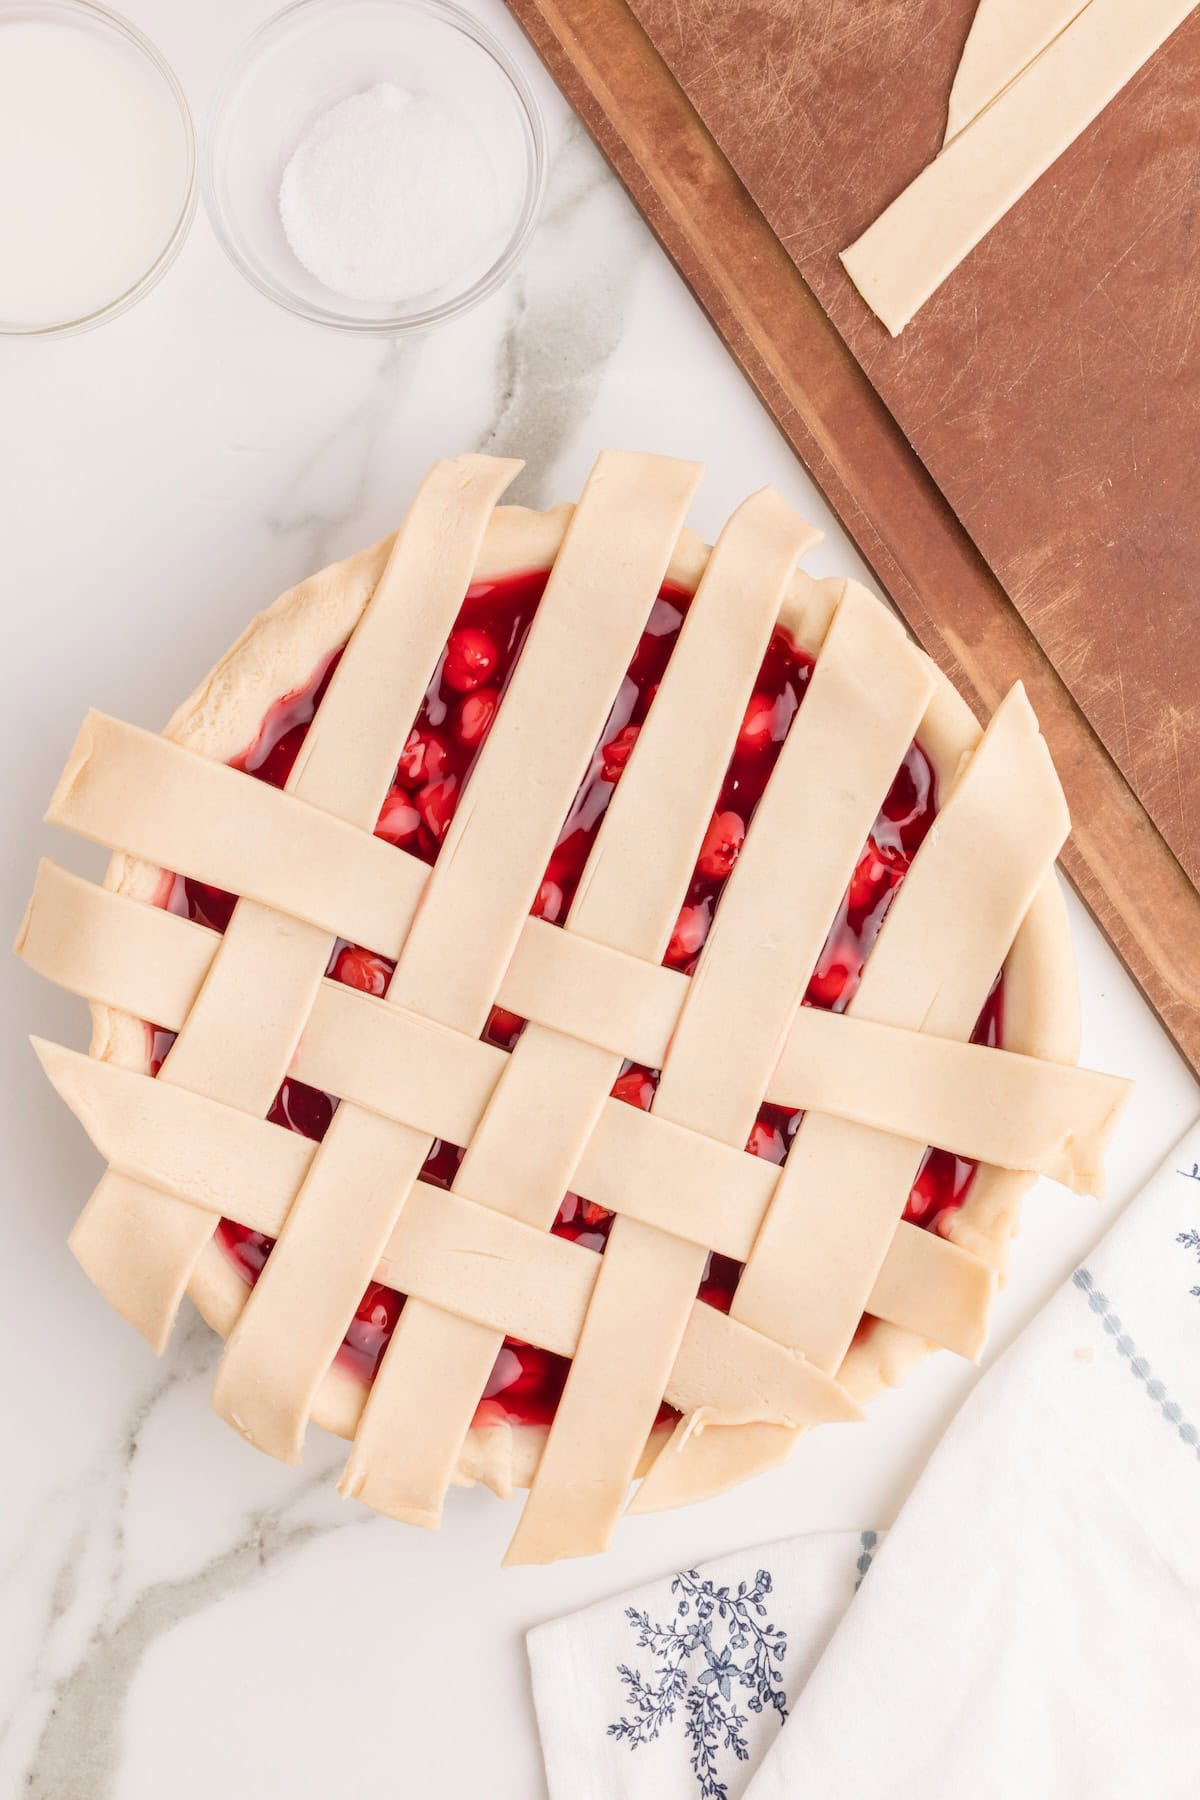
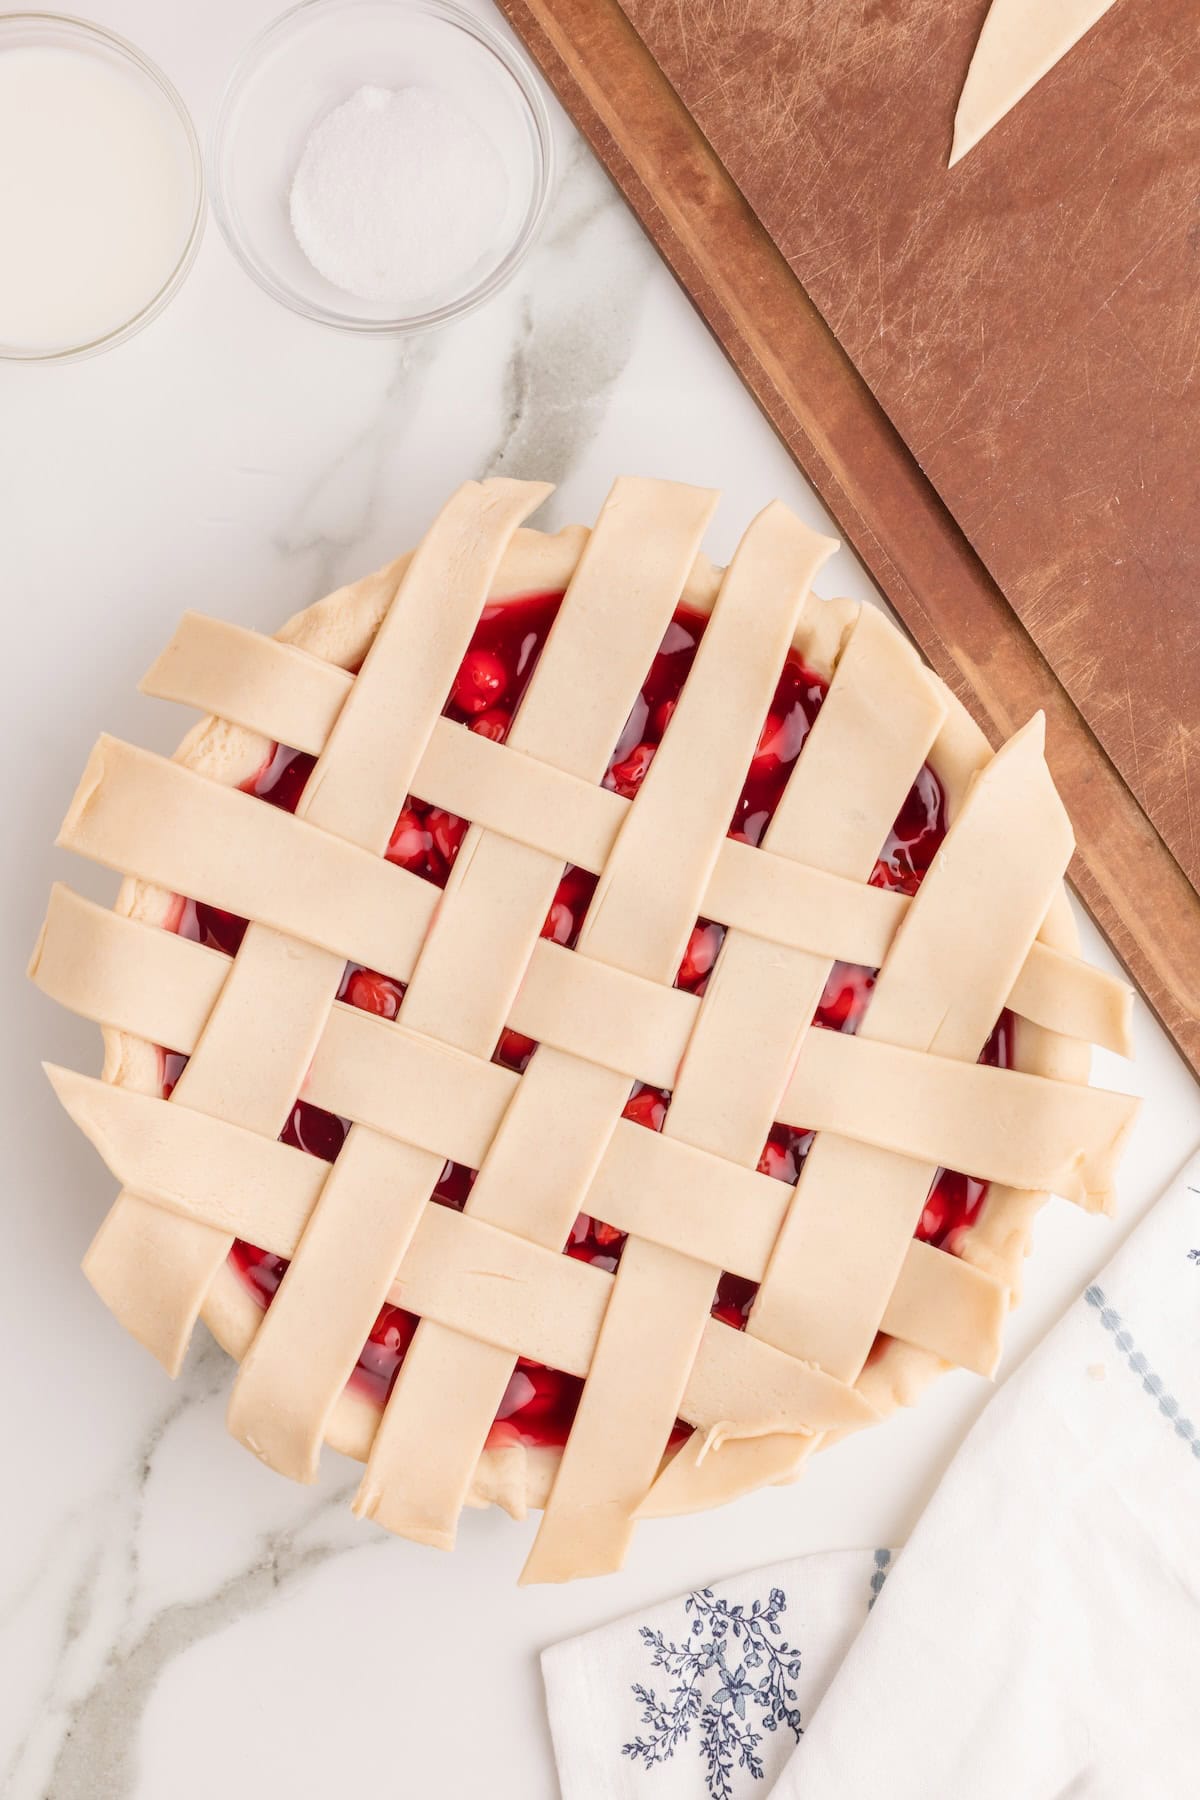
- Now repeat the whole process for the top half of the pie.
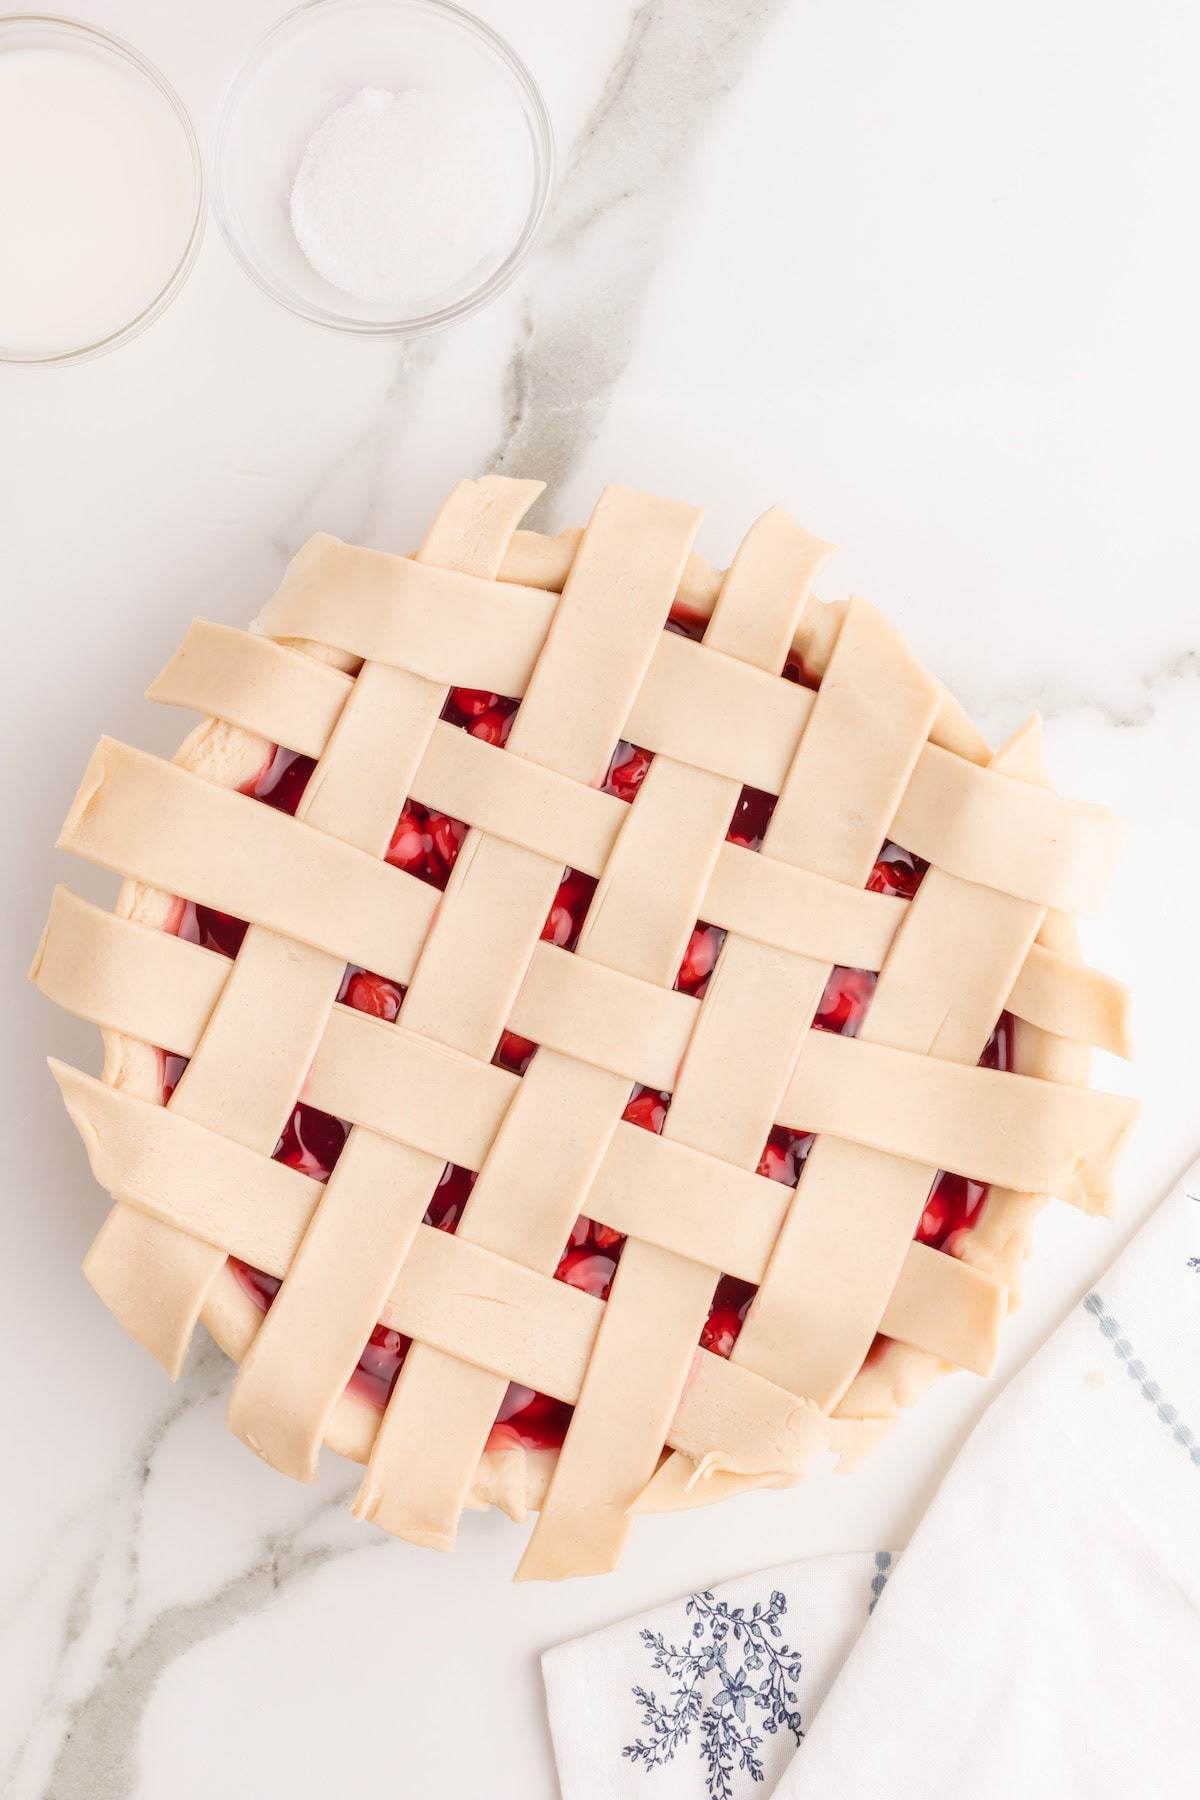
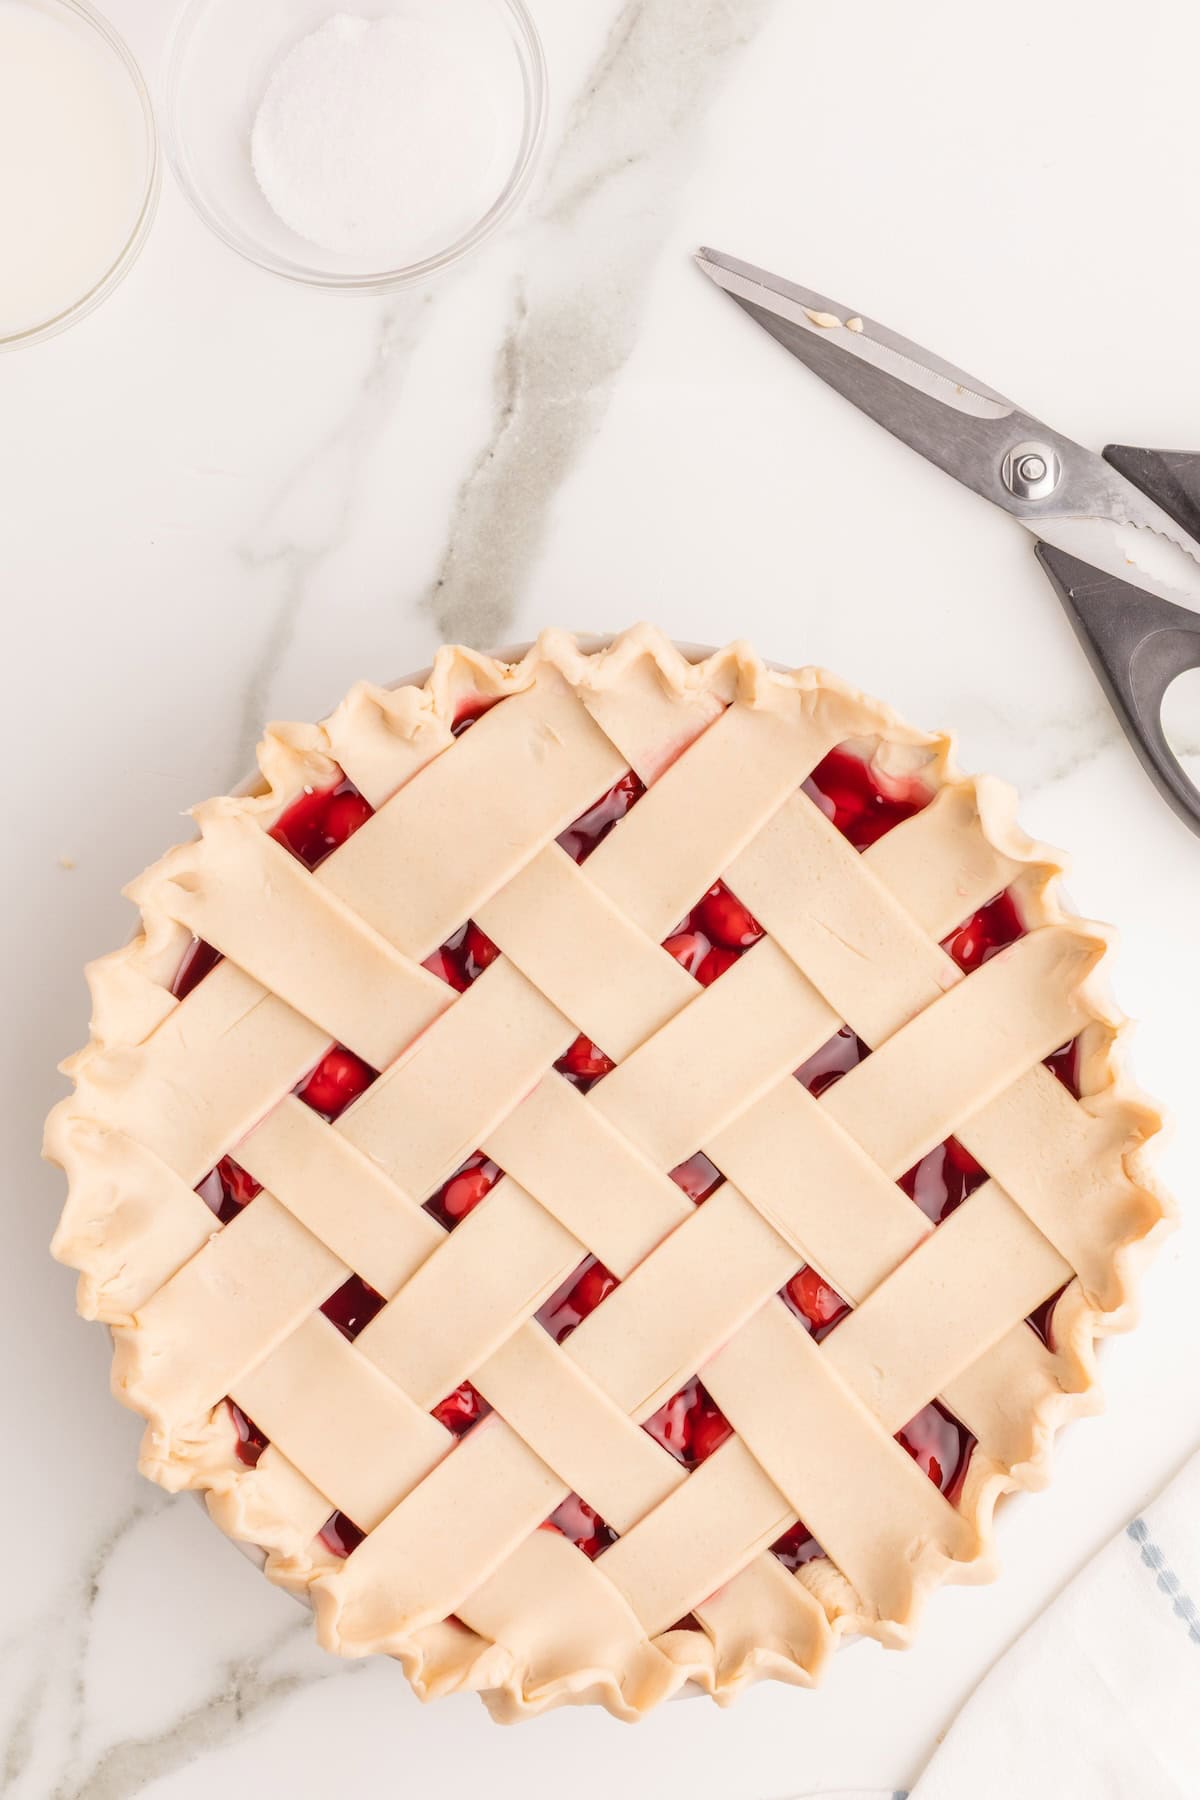
- Using a sharp pair of scissors, trim the strips about a half inch below the edge of the bottom crust.
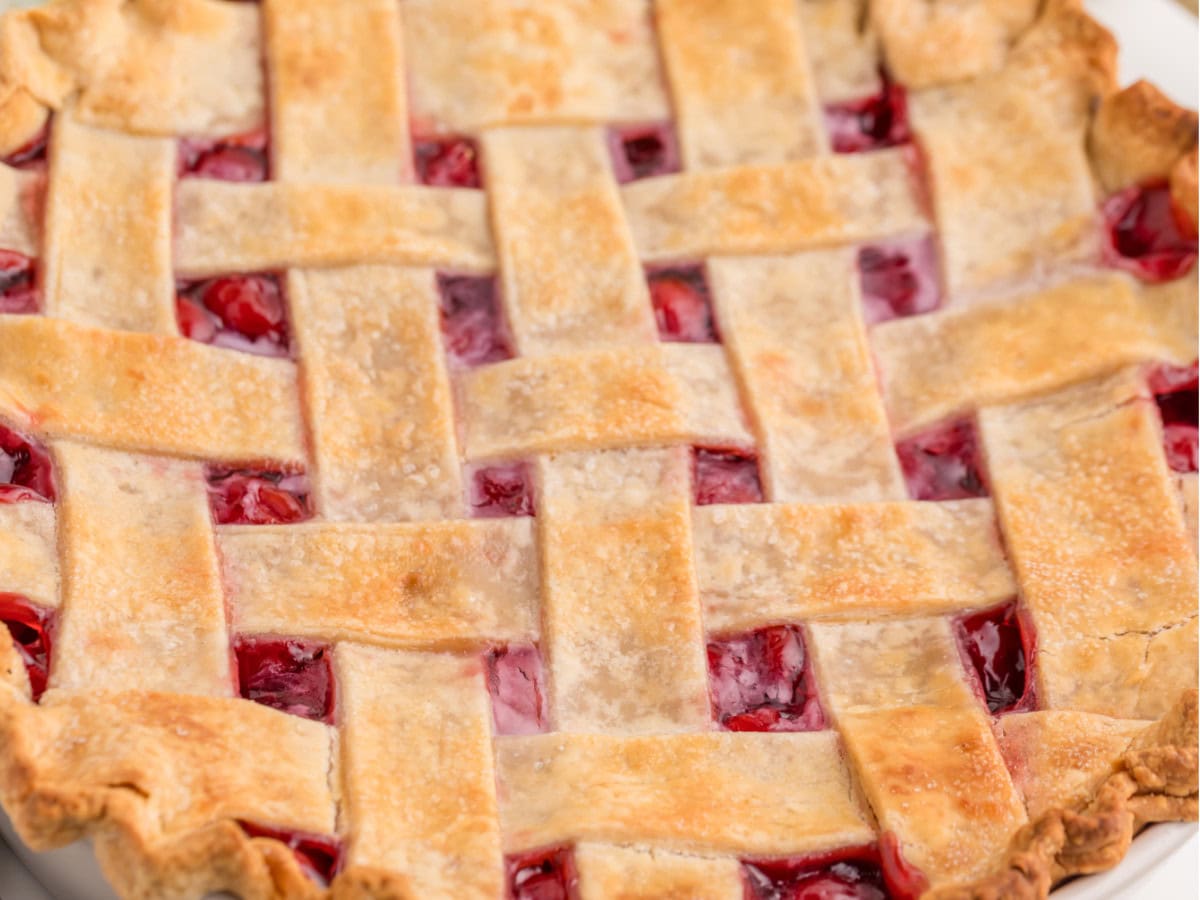
- Crimp the top and bottom crusts together with your fingers, squishing them together as you go around. See photo below.
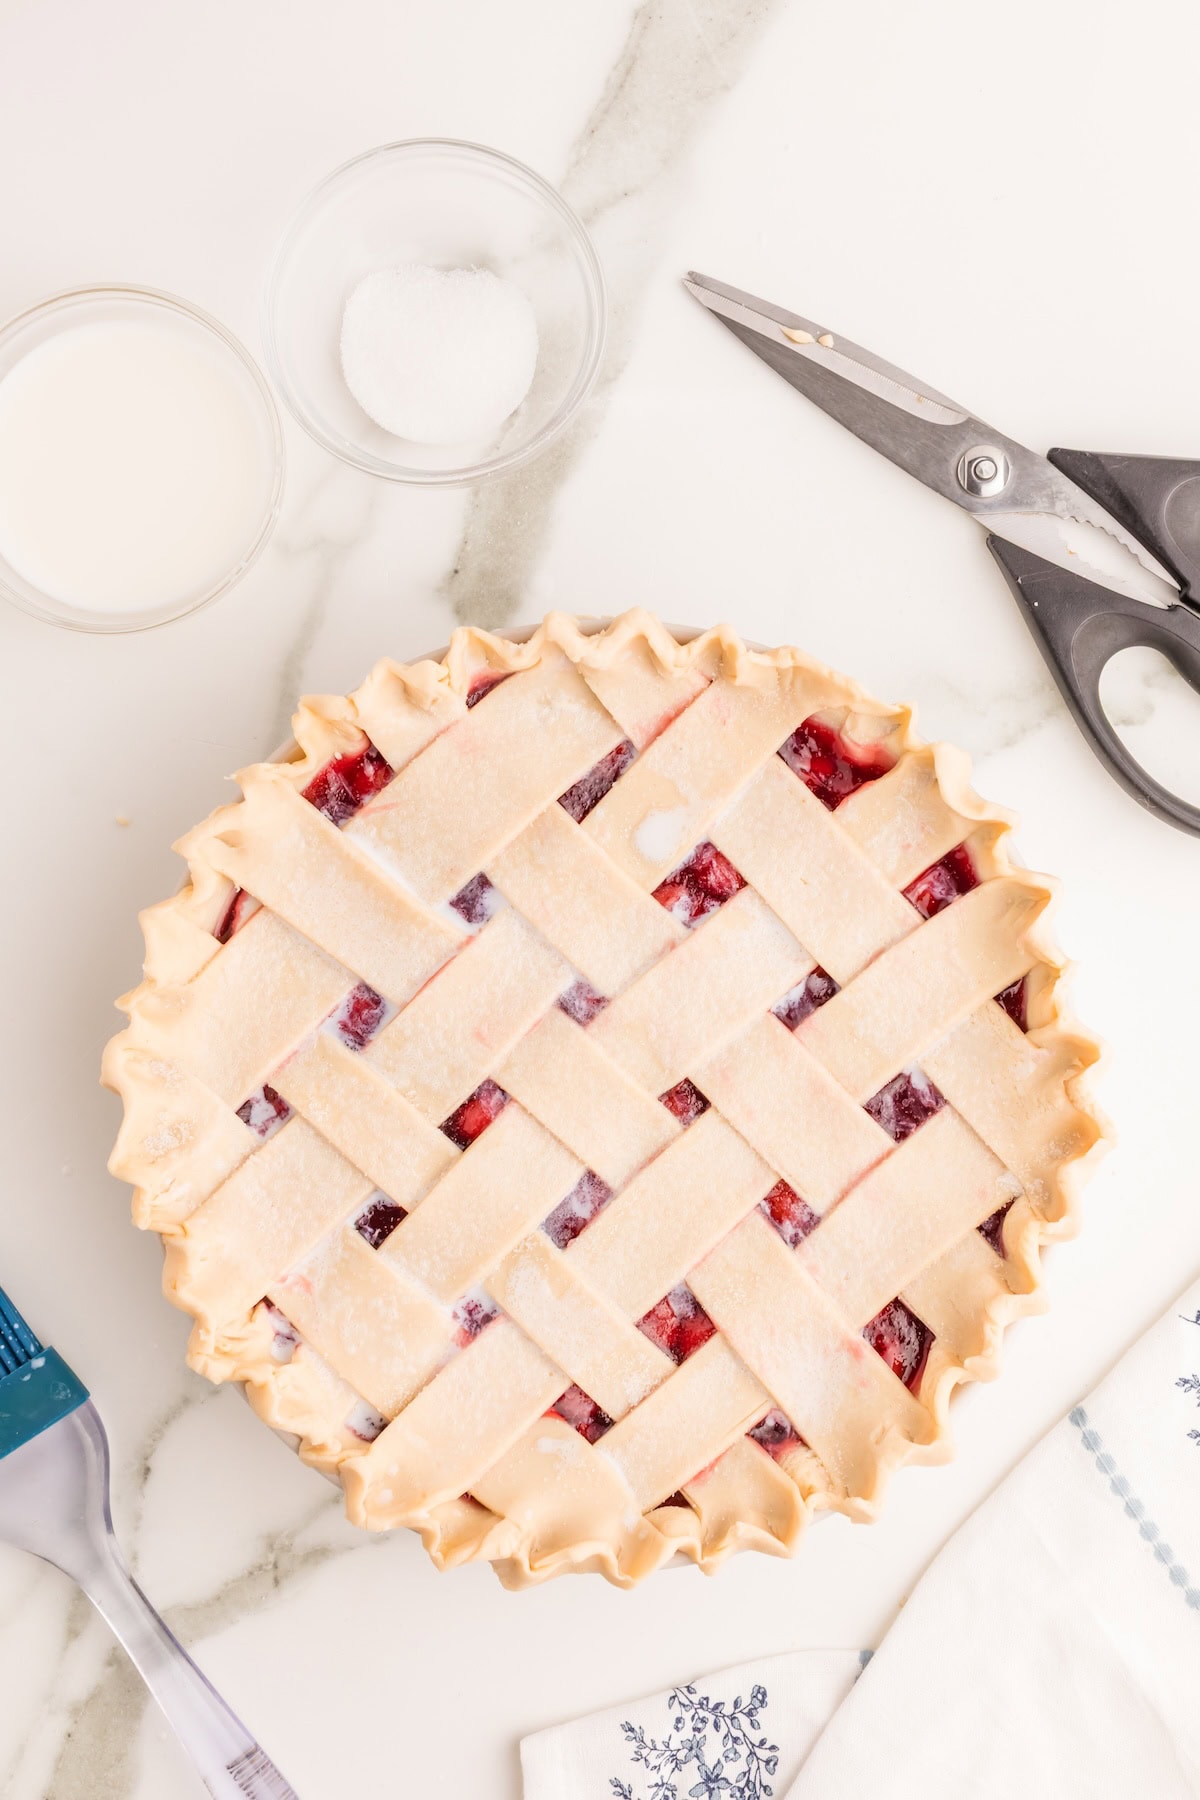
- Brush the top crust with milk and sprinkle with sugar. This is just to make it pretty and not at all necessary because the sweetness of the cherry pie filling doesn't need anything else. Place pie in the oven on top of a baking sheet, just in case there are drips.
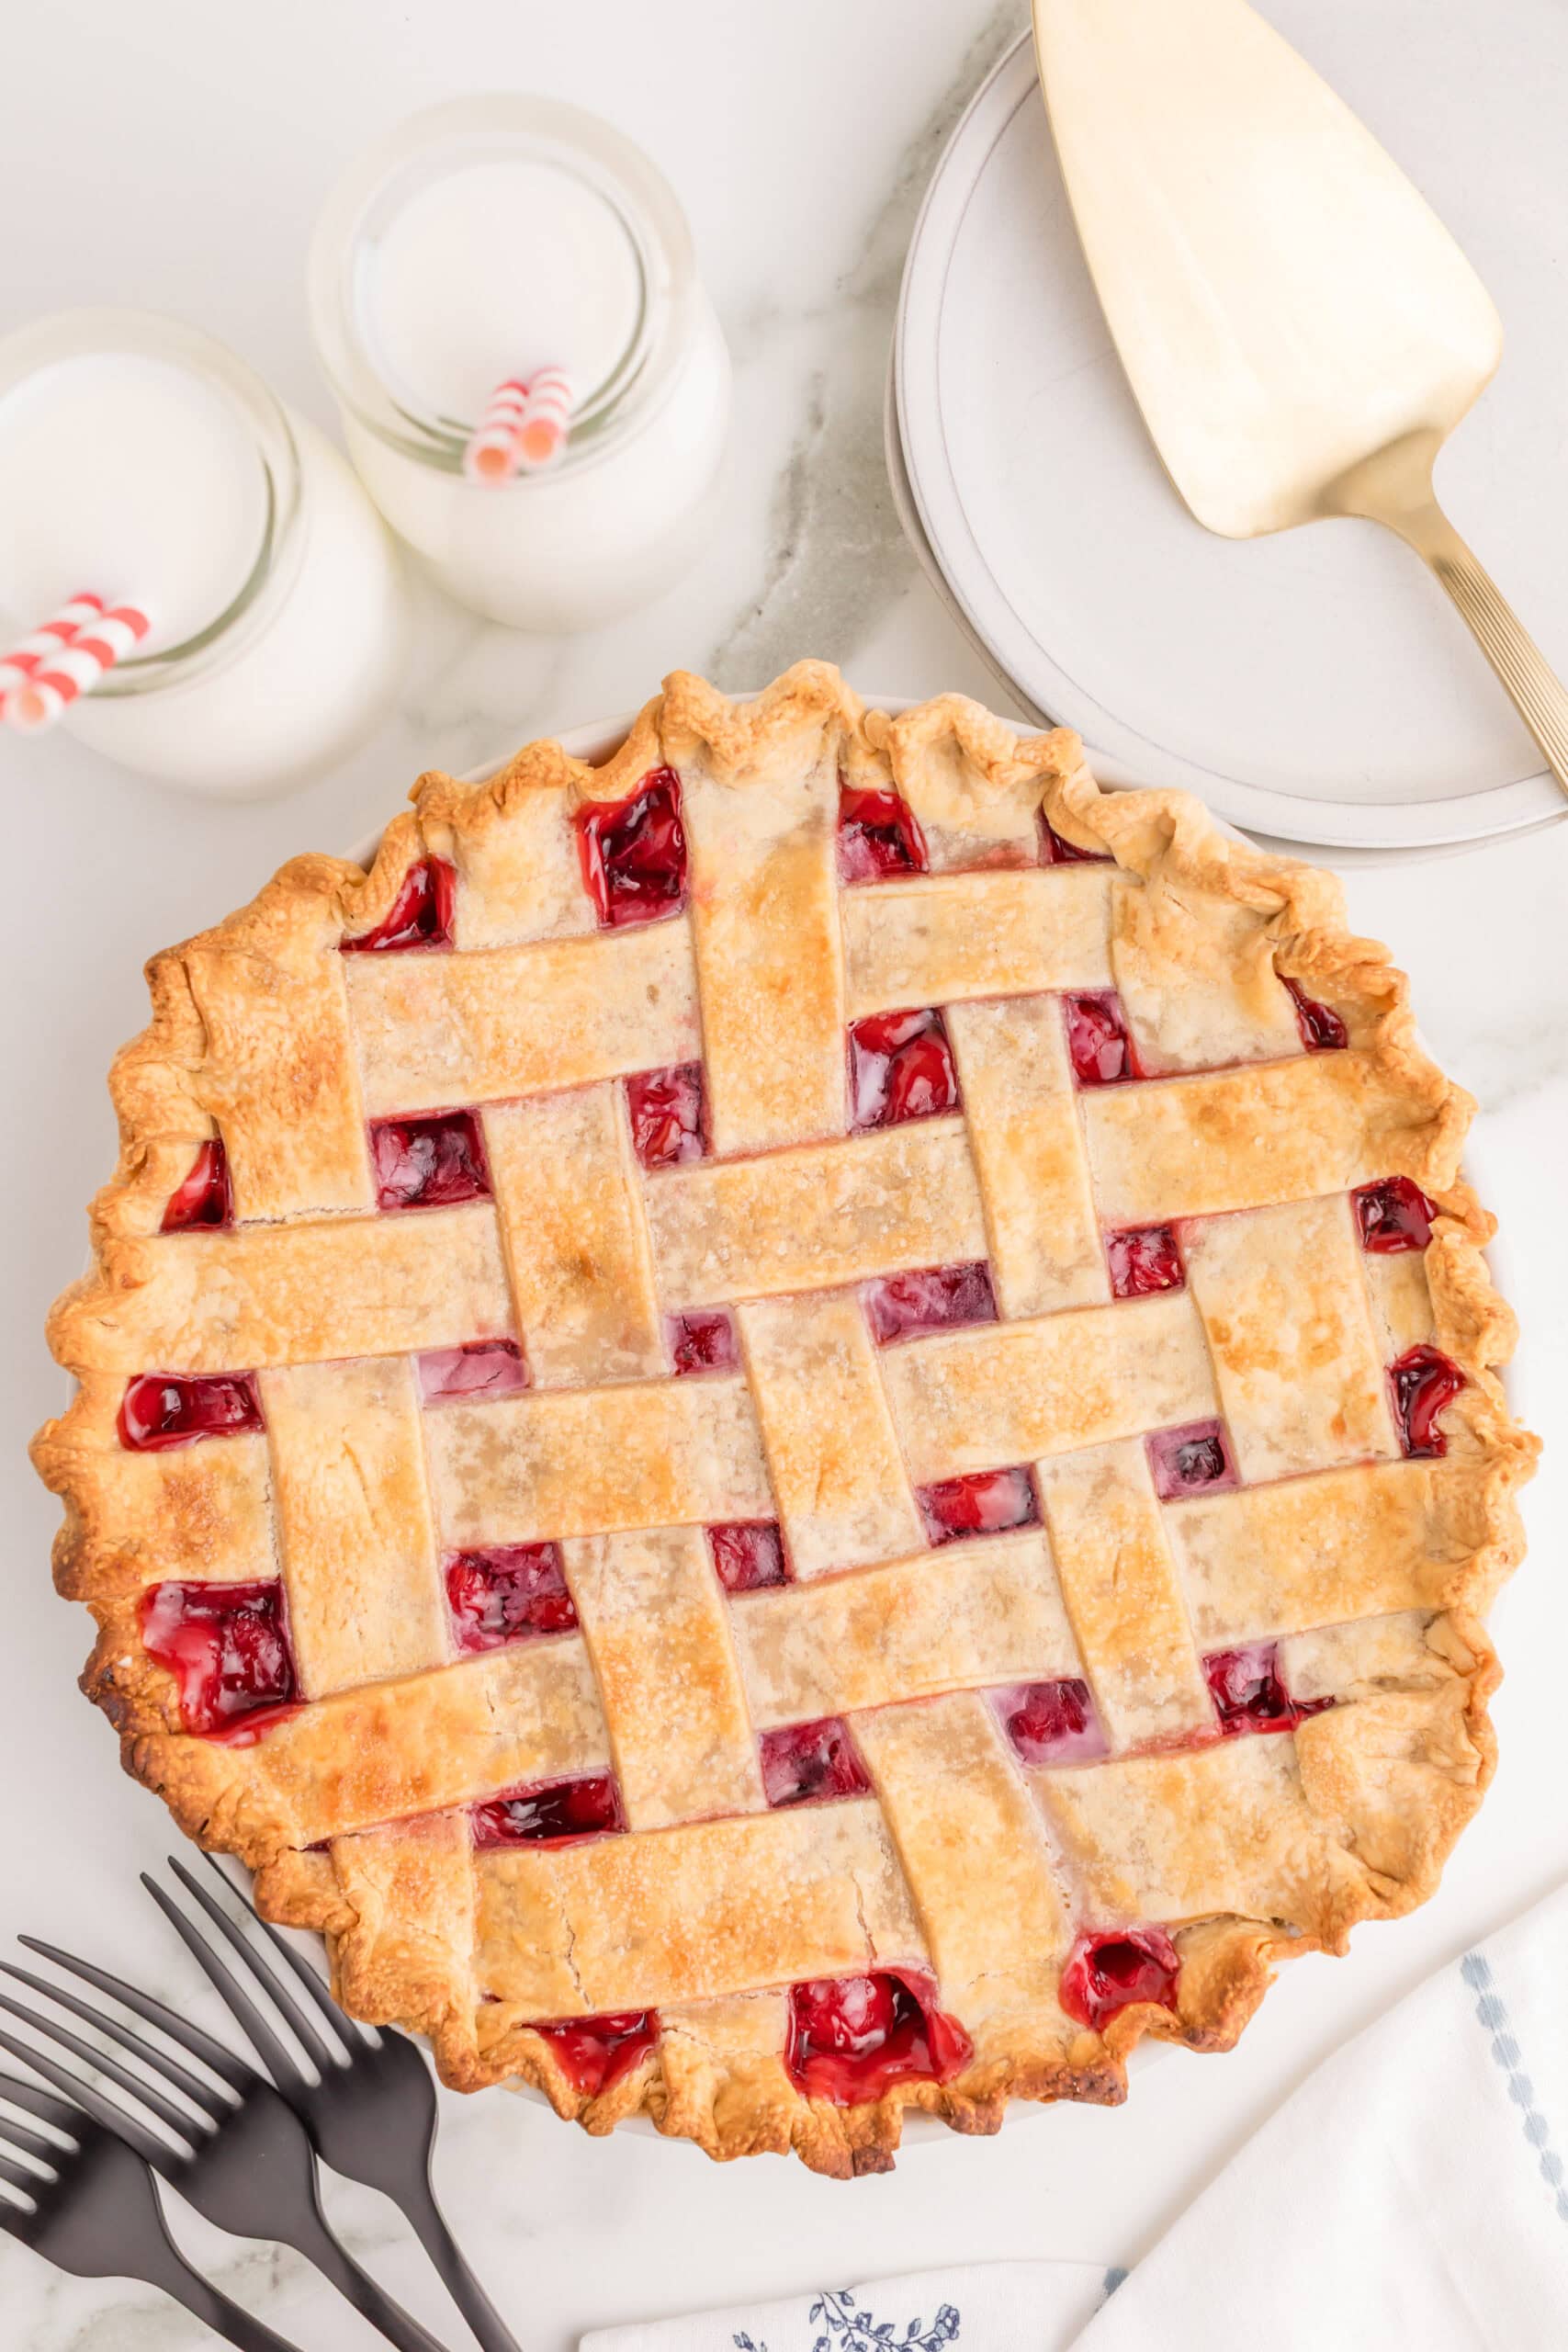
- Bake until the crust is golden brown and the filling is bubbling, about 40-45 minutes. After the first 15 minutes, cover the outer edge of the pie with aluminum foil or a pie shield to make sure it doesn't get too brown. (See link in notes for a pie shield.)
- Cool your fresh cherry pie at least an hour before serving. The filling will set up as the pie cools.
- Top with a scoop of vanilla ice cream and serve.
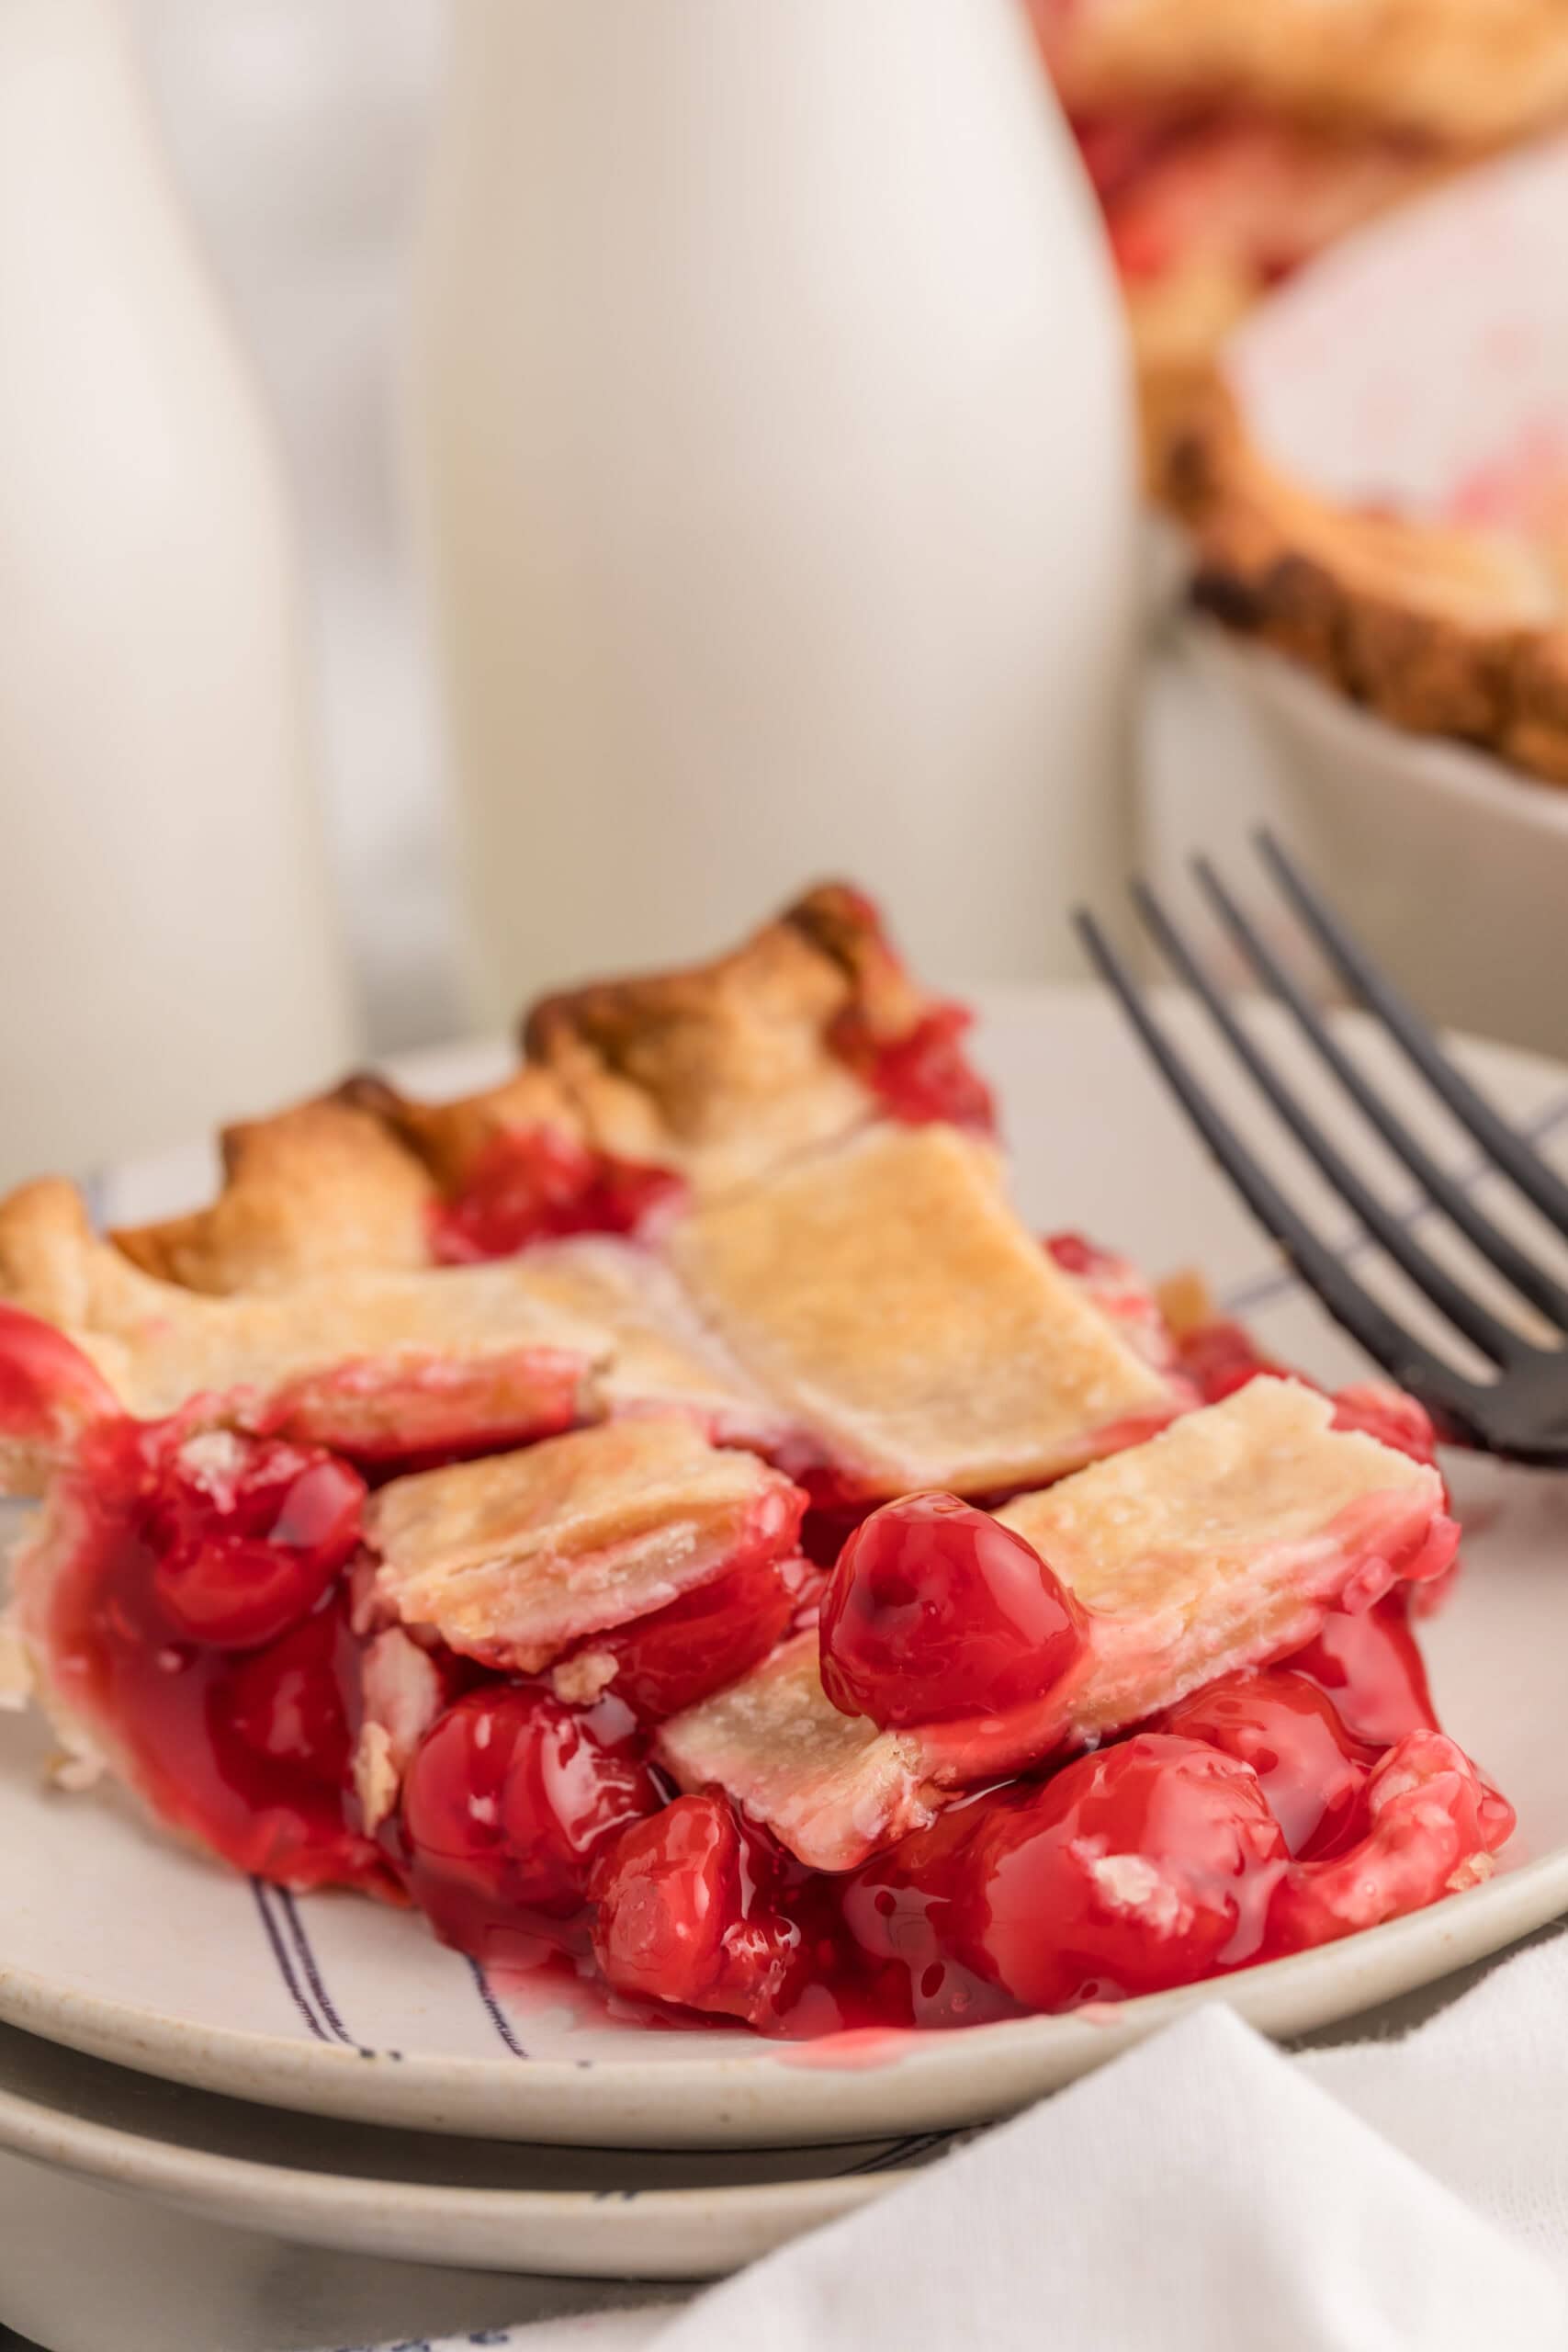
Storing leftover Cherry Pie
Allow the cherry pie to cool completely before storing it. Cover the pie dish tightly with plastic wrap or aluminum foil, or transfer individual slices to an airtight container.
You can keep leftover cherry pie at room temperature for up to 2 days, as long as it contains a commercially prepared fruit filling and no perishable additions. For longer storage, refrigerate the covered pie for up to 4-5 days. The crust may soften slightly in the refrigerator, but the pie will still taste delicious.
To reheat cherry pie, place individual slices in a 250°F oven for about 10-15 minutes or until warmed through. You can also microwave individual slices for 15-30 seconds, although the crust won't stay as crisp. Cherry pie is also delicious served cold, straight from the refrigerator.
You can freeze leftover cherry pie for up to 3 months. Wrap the cooled pie or individual slices tightly in plastic wrap, then add a layer of aluminum foil or place them in a freezer-safe container. Thaw overnight in the refrigerator before serving or reheating.
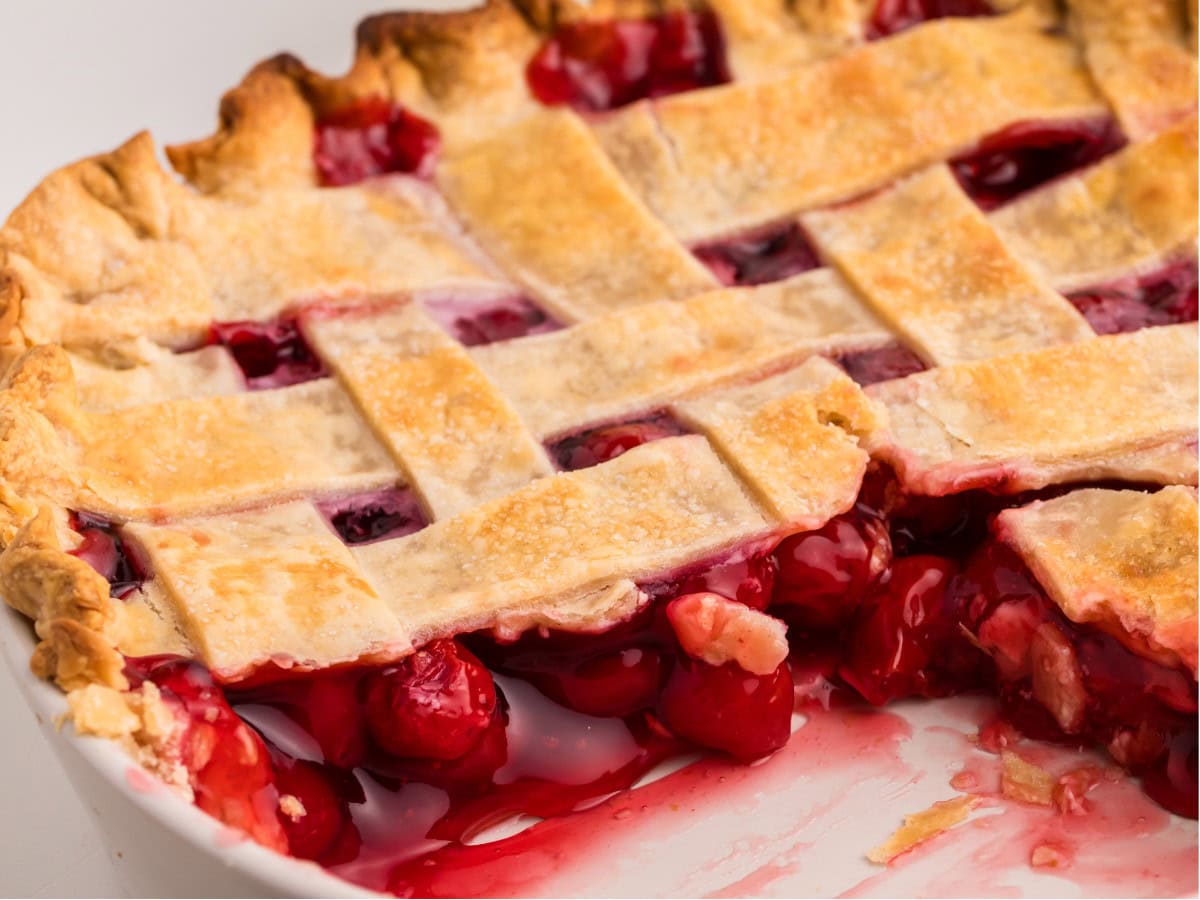
What is a pie shield and why should you use one to bake a homemade cherry pie?
A pie shield is a lightweight (aluminum) ring that sits on the outside edge of a pie crust, protecting it from the heat and preventing it from getting too brown.
The best way to use a pie shield is either to put it on right at the beginning or to bake the pie for 10-15 minutes and then put it on. If you wait until the edge of the crust is getting too brown, it will be too late. You can still use it, but it won't keep the crust from burning in that case.
If you don't have a pie shield, fold aluminum foil into a ring and place that over the edge of the pie before you put it in the oven.
THE REST OF OUR THANKSGIVING MENU
We don't get creative with our Thanksgiving menu. We like routines. We like the comfort of the same old food.
- Roast Turkey
- Creamy Crockpot Mashed Potatoes
- Candied Sweet Potatoes
- Roasted Vegetable & Cornbread Stuffing
- Old-Fashioned Chestnut Stuffing Recipe
- Slow Cooker Sweet Potato Casserole
- Traditional Green Bean Casserole
- Fluffy Cranberry Fruit Salad with Pineapple
- Homemade Orange Cranberry Sauce
- Praline Pumpkin Pecan Pie
- The Worlds' Best Pecan Pie
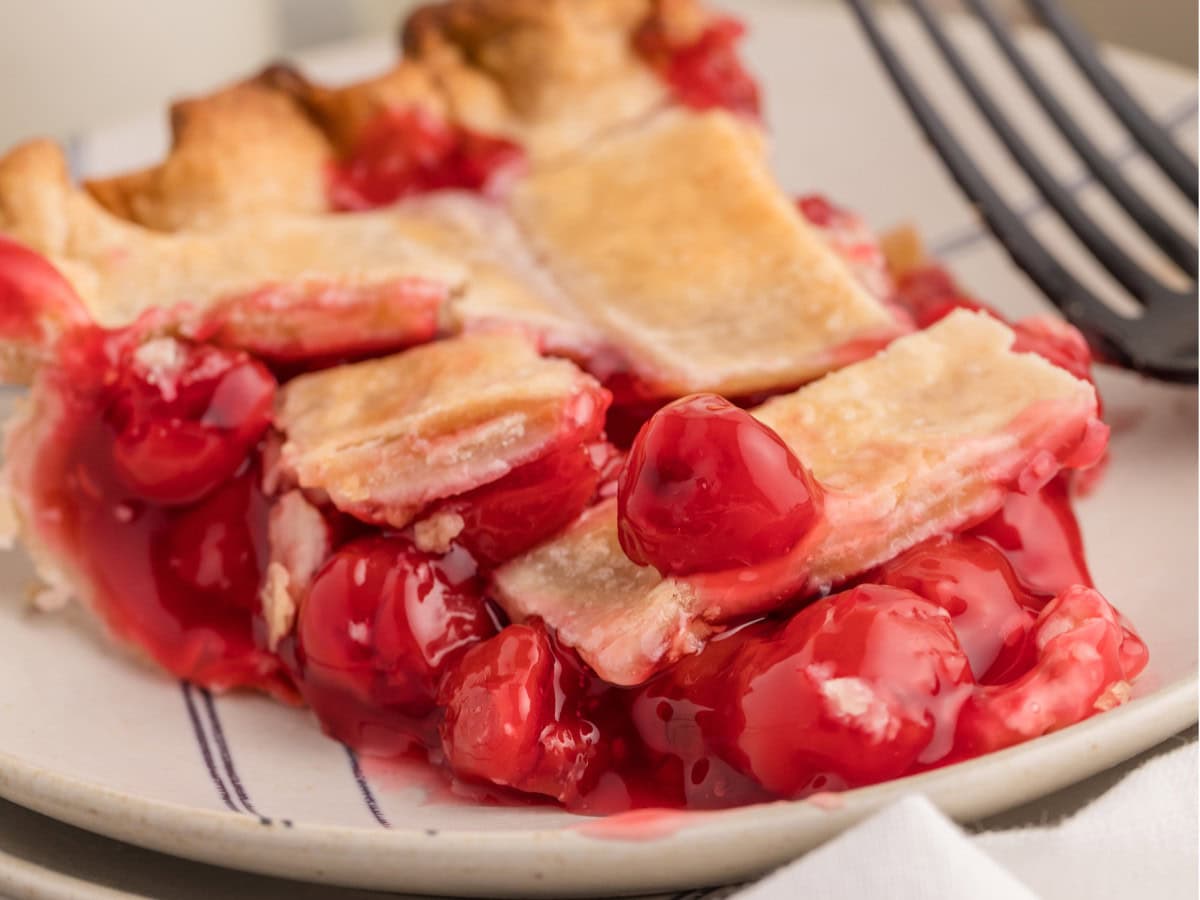
- Couldn't Be Easier Cherry Pie
- No Church Pumpkin Pie Ice Cream
And for the leftovers, try one of these delights:
You can read more about my easy and traditional Thanksgiving menu.
Recipe
Couldn't Be Easier Cherry Pie Recipe
Ingredients
- 2 unbaked pie crust I always buy these in the dairy case pre-made. I am normally a make-it-from-scratch kind of girl, but on Thanksgiving, there's so much to do already, without making homemade pastry dough. I have gotten the store brand and the Pillsbury, and both come out very nicely.
- 2 cans cherry pie filling I have used both the regular and the lower sugar. These days I use either 2 cans of regular or one of each. (Two cans of lower sugar with Splenda makes the pie come out tasting odd.), with Splenda
- 1 teaspoons almond extract
- milk
- sugar
Instructions
- Preheat oven to 425.
- Place one pie crust in a deep dish pie plate. Allow your little helper to use her fingers to press it into the bottom, sides, and especially the corners of the plate. (Yes, pie plates are round and don't have corners. I mean the place where the sides connect to the bottom. That's kind of a corner.)
- Open the cans of pie filling and scrape it into the pie plate. Add the almond extract and mix it with the cherries and juice. Smooth it all out with a spatula.
- Lay the remaining pie crust on a large cutting board (or directly on the counter). Make four cutouts (these will allow the steam to leak out of the pie; without them, the top crust will have big air bubbles trapped under it). If you don't have a cookie cutter, you could cut a couple of Xs or even a couple of slits with a sharp knife after you've put the top crust on the pie.Alternately, see the blog post above for illustrated instructions on making a woven lattice crust for the top of your pie. It only takes a few minutes and makes the presentation so much fancier!
- Carefully lay the second pie crust on top of the pie filling, and press the edges together. You may need to use a bit of water or egg to get them to stick together nicely. Cut the top crust so that it's even with the bottom crust. Pinch the top crust and bottom crust together to make little ridges around the pie.
- Brush the top crust with milk and sprinkle with sugar. This is just to make it pretty and not at all necessary.
- Bake until the crust is golden brown, about 40-45 minutes. After the first 15 minutes, cover the outer edge of the pie with aluminum foil or a pie shield to make sure it doesn't get too brown. (See link in notes for a pie shield.)
- Cool at least an hour before serving. The filling will set up as the pie cools.

Joyce says
I would like to use the can cherries with the splenda but I agree they have a strange taste. I never thought to mix a can of regular with the splenda ones. I will try that.
Joyce
Jo says
How do you store the pie
Tara Ziegmont says
I just store mine on the counter. It will stay good for about three days.
OnePerfectBite says
I love the pies that you've made part of your holiday. The cherry pie sounds delicious.
jean says
This is my daughter's favorite pie so she always makes it and brings it to Thanksgiving dinner. Enjoy your cherry pie!
Emily says
My, it doesn't get any easier than this! And boy would I like to have a piece of that cherry pie right now! Thanks for sharing with us. 🙂
Anita@theycallmejammi says
Looks yummy and so colorful. Thanks for the recipe.
Geri@heartnsoulcooking says
No one knows this but when I don't have time to make dessert this is my favorite way to make a cherry pie. My family think I spent all afternoon make one of they favorites.
Geri
FeelsLikeHomeBlog says
Joyce - Given a choice, I usually go with the all sugar ones. They just taste better. Mixing it one can of each is much less noticeable, but still not as good as the original. (Isn't that always the case?)
FeelsLikeHomeBlog says
It'll be our secret. 😉
live.love.eat says
Definitely sounds easy. And looks beautiful!
thediaperdiaries says
That looks delicious!!
Shan @ the fairy blogmother says
Shortcuts in baking are good. And nobody ever has to know.
Shan @ the fairy blogmother says
Shortcuts in baking are good. And nobody ever has to know.
Nicci says
I also make three pies, regardless of how many guests we are having: pumpkin pie, cherry pie, and Vermont Maple Apple Pie (YUM). My cherry pie always fails, so I was going to give up and buy a frozen pie this year, but I think I can handle your recipe. 🙂
Nedra Crouse says
So easy my husband is making it right now. Thanks for sharing.
Debi says
There must be an error...14 minutes to bake?!!!
Tara Ziegmont says
You're right. It should have been 40-45. Not sure where 14 came from!
Karla says
Is the baking the same time for a homemade crust? Thank you ☺️
Tara Ziegmont says
I'm not sure what you're asking? If you have a homemade crust recipe, you should follow those instructions.
Vlad says
I dont understand how u dont understand her question-- A homemade crust doesn't have a specific cooking time for cherry pies...its homemade crust, so how can she "follow those instructions"?
Tara Gerner says
Presumably, the recipe she used had instructions.
Katie says
Thank you! This is exactly the type of recipe I was looking for! After all of the Thanksgiving and Christmas baking I just wanted a super simple cherry pie recipe! You’re the best!!
Marianne says
Please help. When I cut the pie cherries run everywhere I’m wondering if maybe a teaspoon of cornstarch or tapioca or something would help. Even after I let it sit on the counter for hours as soon as I cut it the pies run all over it taste delicious it just doesn’t look professional
Tara Ziegmont says
If your filling is very saucy, there's no way to avoid that. You could certainly mix a tablespoon of cornstarch with some water and mix that into the sauce before you cook it, but it would be a lot of work to get the sauce out of the cherries, mix in the cornstarch, and then mix the sauce back in. You would probably be further ahead to make a filling from scratch and limit the amount of liquid in the recipe.
My best suggestion would be to drain off or scrape off as much of the liquid as possible from the filling before filling the pie. That should help the pie to stay together a little more. But really, the filling runs out of most pies when they are cut. Get a pie gate, and use it after you cut the pie. That will keep the filling in where it's supposed to be.
Tara Ziegmont says
I've been thinking more about this. I wonder what would happen if you mixed the canned filling, cherries and all, with 1/4 to 1/2 cup of quick cook tapioca before putting it in the pie? That might thicken it up enough that it wouldn't run. It's worth a try if you have time to experiment.
Brenda says
I like to add one half teaspoon abstract to the cherry pie filling…delicious!
Brenda says
I meant to say Almond Extract.
Kris says
What can you do to so bottom crust isn't doughy after baking?
Tara Ziegmont says
It sounds like it needed to bake longer. If the top looks done, just cover it with foil so it doesn't get too brown.
Dina Gaspari says
Thank you for the recipe! I’m making it today, without the almond extract. With so many children having severe nut allergies these days, hidden nut ingredients can be terrifying. Almond extract is especially dangerous as people don’t always remember the baked good has tree nuts in it. Since this is a recipe many will make for the holidays, you could save families from a tragic accident just by adjusting to exclude the almond extract. Thanks kindly!
Donna says
I made this today but I used clear vanilla instead of the almond (I didn't have lol) looks and smells great!! thank you!!
Linda says
Made this tonight. I recommend using only 1/2 t of almond extract. A full teaspoon is Too much!
Leslie Coffey says
Followed recipe exactly except didn’t brush anything on top. Made a lattice over top with the second crust to top instead of a whole crust.. Did use the almond extract and sprinkled a random amount of sugar over filling, mixed it in, sprinkled sugar over the lattice top. Baked 45 minutes. Came out perfectly.
liz says
large can or regular can of cherries?
Tara Gerner says
Large can
Lauren says
When do you add the milk and how much?
Tara Gerner says
Hi Lauren,
Step 6 in the recipe says:
Brush the top crust with milk and sprinkle with sugar. This is just to make it pretty and not at all necessary.
That's when you need the milk. You won't use much but I don't know exactly how much you will use. Maybe a tablespoon or two.
Amy Steffen says
I have made this pie twice to rave reviews and it is so easy! Win win!
Anonymous says
Thank you for sharing this recipe